Introduction
The Amiga 1200 is a popular personal computer that was released in the early 1990s. It was produced by Commodore International and is an improved version of the Amiga 500.
The Amiga 1200 has become a beloved classic among retro computing enthusiasts and hobbyists. Capacitors are an essential component of electronic devices, including the Amiga 1200.
These tiny devices store electrical energy and help regulate the flow of current in electronic circuits. Capacitors play a critical role in ensuring that electronics function properly and safely.
Explanation of the Amiga 1200 Computer
The Amiga 1200 was released in October of 1992 and quickly became popular due to its advanced graphics capabilities, powerful CPU, and affordable price point. It featured a Motorola MC68EC020 processor running at 14 MHz, up to 2 MB of chip RAM, and expandable hard drive storage.
The Amiga operating system (OS) was also an important aspect of this computer’s appeal. The OS provided users with multitasking functionality, allowing them to run multiple programs simultaneously without experiencing performance issues.
The graphical user interface (GUI) was also praised for its ease-of-use and customization options. Throughout its lifespan, many upgrades were made available for the Amiga 1200, such as additional memory expansion cards, accelerators, hard drives, sound cards, etc., which allowed users to customize their computers according to their needs.
Importance of Capacitors in Electronic Devices
In electronic devices such as computers or televisions capacitors play an essential role despite being small components compared to other parts like CPUs or screens. Capacitors act as energy storing units; they work by holding electrical charges that can be used to regulate or deliver power to various components in a device.
Capacitors also help filter out unwanted electrical noise from the power supply. Without capacitors, electronic devices would be prone to electrical interference, which can cause malfunctions and damage to other components.
Another important function of capacitors is that they smooth the DC voltage supplied by the power supply. This is crucial since electronic devices need a stable voltage source for optimal functionality, which becomes particularly important in high-performance computers like the Amiga 1200 that require stable voltages to work correctly.
Overview of Capacitor List for the Amiga 1200
The Amiga 1200 capacitor list consists of several types of capacitors; it’s essential to know which capacitor type goes where. The following are the various types:
- Tantalum Capacitor (53 x 10uF)
- Ceramic Capacitor (100nF)
- Polyester Film Capacitor (470uF)
- Electrolytic Capacitor (47uF, 220uF, and 3300uF).
The capacitors on an Amiga motherboard tend to degrade over time due to age and usage; this aging process can lead them not performing as well as they should and even failing completely. If left unaddressed, these faulty or worn-out capacitors can lead to instability issues like system crashes, faulty sound output, or other unexpected behavior. In light of this fact, it is vital that users maintain their computers regularly by replacing these aging capacitors as part of routine maintenance procedures.
The Basics: What are Capacitors?
Capacitors are a fundamental component of electronic devices and play an essential role in the function of circuit boards. Simply put, a capacitor is a device that stores electrical energy. A capacitor is made up of two conductive plates with an insulating material, also known as a dielectric, in between them.
When voltage is applied to the plates, electrons begin to accumulate on one plate and move away from the other plate. This buildup of charge creates an electric field between the two plates.
Capacitors are commonly used to filter out unwanted noise or fluctuations in voltage on a circuit board. In addition, capacitors can also be used to store electrical energy temporarily and release it when needed.
Types of Capacitors
There are many different types of capacitors available, each with its own unique characteristics that make it best suited for specific applications. Some common types include ceramic capacitors, electrolytic capacitors, film capacitors and tantalum capacitors.
Ceramic capacitors are typically small and inexpensive and offer high stability over time. Electrolytic capacitors come in both polarized and non-polarized forms and offer high capacitance values at low cost but may not have long-term stability.
Film capacitors have high temperature stability, low leakage current but are more expensive compared to ceramic or electrolytic types. Tantalum Capacitor comes in both solid state form or as wet-electrolyte type which offers high capacitance values with excellent reliability but tend to be more expensive.
Capacitor Characteristics
The characteristics of a capacitor can greatly affect its performance when used in electronic devices. Some important attributes include:
– Capacitance: The unit for measuring capacitance is Farads (F). The higher the capacitance value, the more electrical charge it can store.
– Voltage Rating: The maximum voltage that a capacitor can handle without breaking down or shorting out. Exceeding the voltage rating can cause damage to the capacitor or other components on the circuit board.
– Tolerance: Capacitors have a tolerance rating, which indicates how close they are to their specified capacitance value. – Polarization: Some capacitors are polarized, meaning they have a positive and negative side and must be installed in the proper orientation.
Capacitor Effects on Electronic Devices
The use of capacitors in electronic devices can greatly impact their performance. For example, when used in power supply circuits, capacitors can help to filter out unwanted noise or fluctuations in voltage.
In audio circuits, capacitors can be used to block DC voltage while allowing AC signals to pass through. However, if a capacitor fails or becomes damaged due to age or environmental factors such as heat, it can adversely affect the performance of an electronic device.
This could result in issues such as distorted audio output or even complete failure of the device. It is important to choose the right type of capacitor for each application and ensure that they are properly installed and maintained over time to avoid any potential issues with electronic devices.
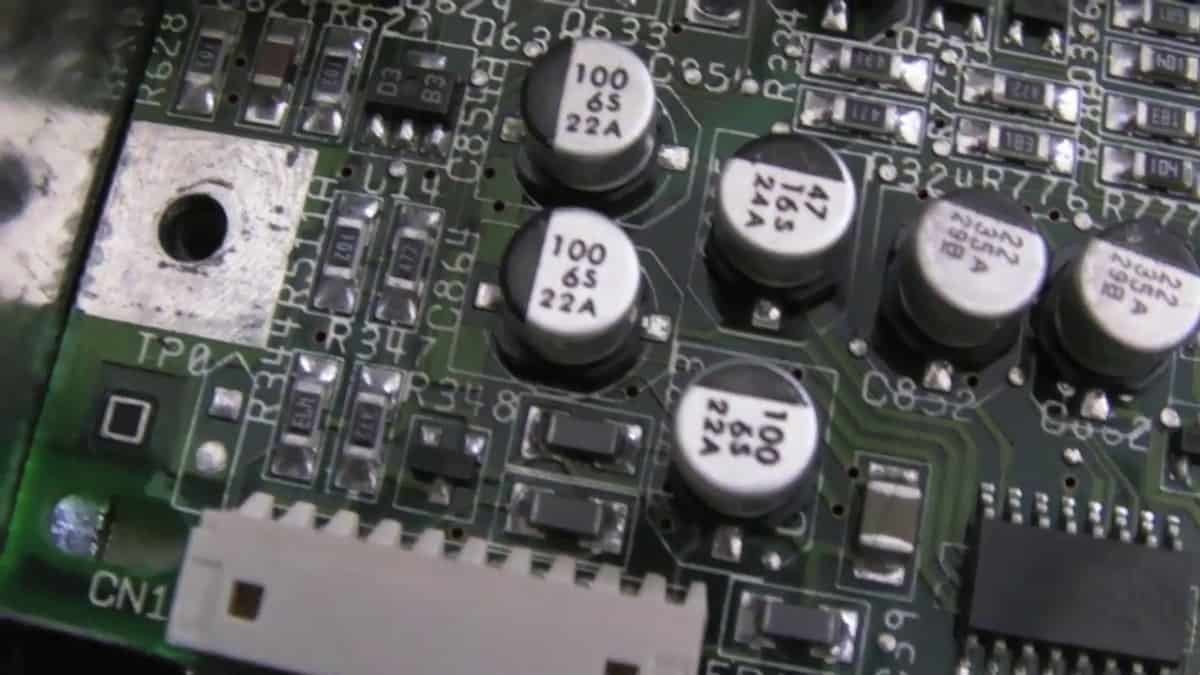
The Amiga 1200 Capacitor List
The Amiga 1200 is a beloved computer system among retro computing enthusiasts. It was released in 1992 and quickly gained popularity due to its powerful specs, expandability, and innovative features such as the PCMCIA slot. However, like any electronic device, the Amiga 1200 is not immune to age-related issues such as component failure.
One of the most common issues that affect this computer is the failure of its capacitors. A capacitor is an electronic component that stores electrical energy in an electric field.
In simple terms, it acts like a small rechargeable battery that can charge and discharge very quickly. The Amiga 1200 has a total of eleven capacitors located on its motherboard, all of which can fail over time due to various factors such as heat, humidity, or manufacturing defects.
Importance of Replacing Faulty Capacitors
When a capacitor fails in an electronic device such as the Amiga 1200, it can cause several problems ranging from minor glitches and crashes to complete system failure. For example, failed capacitors can cause instability in the power supply voltage or introduce noise into critical signal paths. They can also leak electrolyte fluid onto the motherboard or even explode under extreme conditions.
Therefore, it’s important to replace faulty capacitors on your Amiga 1200 if you want to ensure its long-term reliability and performance. Failure to do so may result in irreversible damage to your computer or even render it unusable.
Detailed Explanation of Each Capacitor Listed
The following is a detailed list of all eleven capacitors found on the Amiga 1200 motherboard:
- C1 – .47uf Electrolytic Capacitor – This capacitor filters noise out of audio signals.
- C2 – .47uf Electrolytic Capacitor – This capacitor filters noise out of audio signals.
- C3 – 100uf Electrolytic Capacitor – This capacitor provides filtering for the power supply voltage.
- C4 – 100uf Electrolytic Capacitor – This capacitor provides filtering for the power supply voltage.
- C5 – 47uf Electrolytic Capacitor – This capacitor provides filtering for the power supply voltage.
- C6 – 47uf Electrolytic Capacitor – This capacitor provides filtering for the power supply voltage.
- C7 – .1uf Ceramic Capacitor – This capacitor filters noise out of video signals and prevents RF interference.
- C8 – .1uf Ceramic Capacitor – This capacitor filters noise out of video signals and prevents RF interference.
- C9 – .1uf Ceramic Capacitor – Provides additional filtering on the system lines in order to ensure signal integrity.
- C10 -.056uF Mylar Film Axial (not round, like most capacitors) – Regulates timing pulses
- C11 -.047uF Mylar Film Axial (not round, like most capacitors) – Regulates timing pulses
It’s important to note that replacing these capacitors requires some technical knowledge and skill. If you’re not familiar with soldering or electronics repair, it’s best to seek help from a professional technician.
Replacing faulty capacitors on your Amiga 1200 is crucial if you want to ensure its long-term reliability and performance. By understanding the function and importance of each of the eleven capacitors listed above, you’ll be better equipped to diagnose and fix any issues that may arise with your beloved computer system.
Subtopics on Specific Capacitors
C1, C2, C3, C4, C5 and C6 Capacitors
These capacitors are located in the power supply portion of the Amiga 1200 motherboard. Specifically, they are located between the diode bridge and the voltage regulator ICs.
They are all rated at 3300 uF and have a voltage rating of 16V. These capacitors play an important role in filtering out noise from the power supply which can cause instability in the system.
C1 is responsible for filtering out high frequency noise and ensuring a clean DC voltage to feed into the rest of the circuitry. It is important to ensure that this capacitor is functioning correctly as it can cause issues with stability if it fails.
C2 is responsible for smoothing out any ripples that may occur in the power supply line due to AC current fluctuations. Without this capacitor, these ripples could cause issues with stability or even damage other components.
C3 through C6 are also filter capacitors but their main function is to stabilize the voltage as it passes through different stages of regulation within the power supply section. Without these capacitors, fluctuations in voltage levels could be harmful to other components on the motherboard.
C7, C8, C9, C10 and C11 Capacitors
These capacitors are located near or around several ICs (integrated circuits) on both sides of the Amiga 1200 motherboard. They all have a capacitance rating of 100 nF (nanofarads) and a voltage rating of at least 50V. These types of capacitors are commonly referred to as decoupling capacitors because they help reduce noise on DC power rails by decoupling them from each other.
C7 is specifically associated with U4 which is an audio circuit IC. Without this capacitor, noise and interference could be introduced into the audio signal.
C8 is associated with U6 which is a DMA (Direct Memory Access) controller IC. This capacitor helps to stabilize the voltage supply to this critical component.
C9 and C10 are associated with U7 which is an Agnus chip responsible for graphics processing. These capacitors protect against power spikes or transients that could damage this important chip.
C11 is associated with U12 which is a RAM controller IC. This capacitor serves as a buffer between the power supply and the RAM chips it controls, helping to ensure a stable voltage supply to these components.
Other Less Known or Rarely Mentioned Capacitors in the List
There are several other capacitors listed in the Amiga 1200 Capacitor List that may not be as widely known or frequently mentioned as those previously discussed. Two such capacitors are C102 and C103. C102 is located near U13 which is an FPU (Floating Point Unit) chip responsible for math calculations.
This capacitor helps protect against voltage spikes that could damage this chip. C103, on the other hand, is located near J3 which is an external floppy drive connector.
This capacitor serves as a filter for any noise that might be introduced through this connector into the system. It’s important to remember that while some of these capacitors may seem insignificant in terms of their size or apparent function, they all play important roles in ensuring proper operation and stability of the Amiga 1200 computer system.
Replacement Procedure
Step-by-step guide to replacing old or faulty capacitors in an Amiga 1200 computer
Replacing the capacitors in an Amiga 1200 computer is a relatively simple procedure that can be done by anyone with basic soldering skills. However, it is important to follow the steps carefully to avoid damaging other components or creating new problems. Here is a step-by-step guide that will help you replace the capacitors in your Amiga 1200 computer:
1. Gather the necessary tools and equipment: Before you begin, make sure you have all the necessary tools and equipment on hand. You will need a soldering iron, a solder sucker or desoldering braid, a pair of pliers, and replacement capacitors that match those listed in your Amiga 1200 capacitor list.
2. Open your Amiga 1200 case: The first step is to remove the top cover of your Amiga 1200 case. This can usually be done by removing screws located on the bottom of the case.
3. Locate the old capacitors: Once you have opened your case, locate all of the old capacitors that need to be replaced. They will be identified by their values and locations on your capacitor list.
4. Remove the old capacitors: Heat up each leg of each capacitor with your soldering iron until it becomes liquid enough for you to remove it with pliers or tweezers while holding it down flat against one side so as not to twist or pull out surrounding components. 5. Clean up any excess solder: Use a desoldering tool such as a solder sucker to carefully remove any excess solder from around where each capacitor was removed.
6. Insert new capacitors: Place each new capacitor into its respective location on the board and bend its legs gently toward opposite sides if needed so they are aligned with the holes. 7. Solder new capacitors in place: Using your soldering iron, heat up each leg of the new capacitor until it melts and flows into the hole.
Hold it steady for a few seconds until the solder cools and hardens. 8. Repeat for all capacitors: Repeat steps 4 to 7 for all of the old capacitors that need to be replaced.
Safety precautions to take when replacing these components
Replacing capacitors in an Amiga 1200 computer can be a safe and easy process if proper safety precautions are taken. Here are some important things to keep in mind: 1. Turn off power: Make sure you turn off your computer and unplug it from any power source before starting work on any internal components.
2. Antistatic measures: Wear antistatic wristbands or touch unpainted metal on your case before handling any electronic component to discharge any static electricity that may have built up in your body. 3. Heat protection: Be careful not to touch hot components or use heat-resistant gloves if needed for comfort or safety reasons.
4. Eye protection: Use eye protection such as safety goggles when working with soldering irons or desoldering tools as they can produce harmful fumes and spatter hot metal droplets if not used properly. 5. Follow instructions carefully: Follow the step-by-step guide carefully, making sure you do not damage other components or create new problems while replacing the old capacitors.
Conclusion
Replacing old or faulty capacitors is an important maintenance task that can prolong the life of your Amiga 1200 computer and improve its performance as well as reliability over time. While it may seem daunting at first, following a step-by-step guide like this one will make it a relatively simple process that anyone with basic soldering skills can achieve with ease.
Remember to take all necessary safety precautions and follow the capacitor list carefully to ensure that you choose and install the right capacitors for your specific Amiga 1200 model. With a little care and attention, your Amiga 1200 computer can continue to be a reliable and enjoyable device for years to come.
Conclusion
The Amiga 1200 Capacitor List is an important resource for Amiga 1200 owners and enthusiasts. Understanding the function of capacitors and the potential issues that can arise when they begin to fail is crucial to maintaining a properly functioning computer.
By regularly checking and replacing old or faulty capacitors, users can extend the life of their Amiga 1200 and avoid costly repairs. Replacing capacitors in an Amiga 1200 computer can be a daunting task for those who are not familiar with electronic repair.
However, with proper research and safety precautions, anyone can successfully replace these components. It is important to note that if you do not feel comfortable performing this type of repair, seek help from a professional.
It is also worth mentioning that while the capacitor list provided covers most known capacitors in an Amiga 1200 computer, there may be additional capacitors in your specific machine that are not included on this list. Therefore, it is always important to thoroughly examine your individual system before performing any repairs.
Overall, keeping your Amiga 1200 in good working condition requires regular maintenance and care. By understanding the importance of capacitors and how they affect electronic devices like the Amiga 1200, users can ensure many more years of enjoyment from their beloved computer.
As technology continues to evolve at a rapid pace, it’s comforting to know that classic computers like the Amiga 1200 still have a dedicated following who appreciate its unique capabilities. With proper maintenance and care, these computers will continue to stand the test of time as valuable pieces of computing history for generations to come.