Introduction
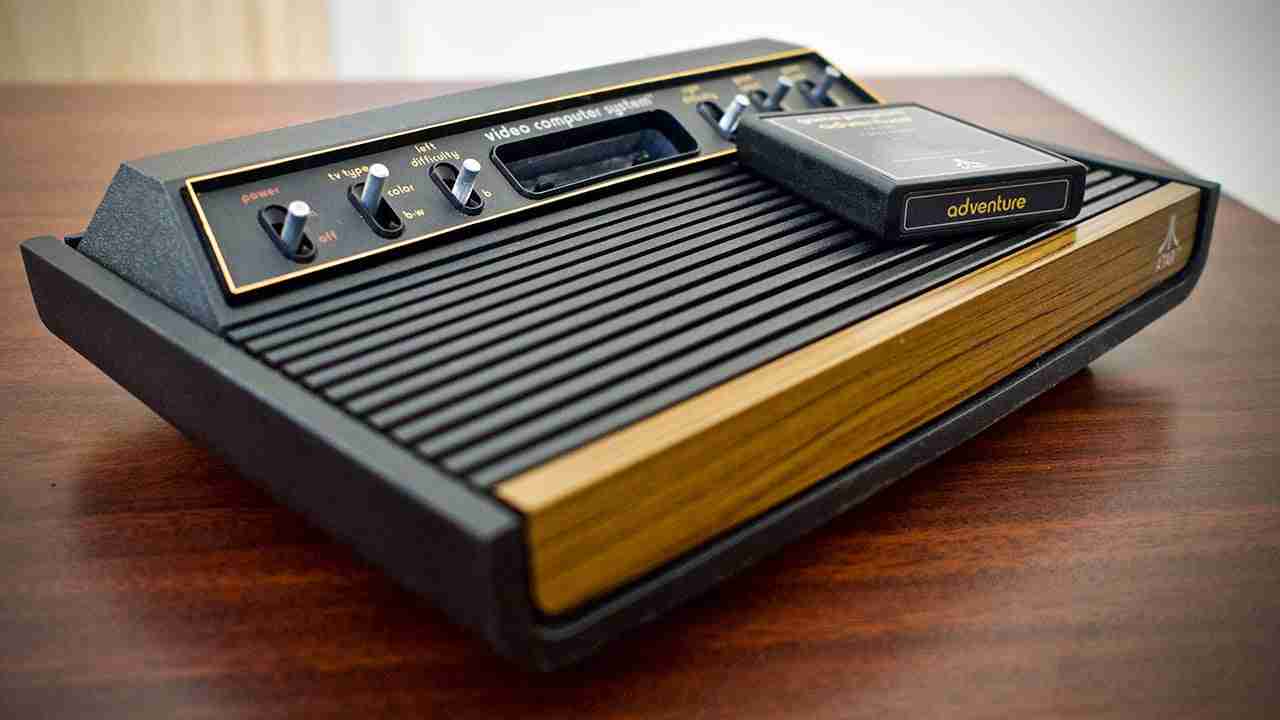
The Atari 2600, fondly remembered by many as the console that kick-started the home video game industry, is a piece of tech history that many of us hold dear. For many, the nostalgia of playing the Atari 2600 games remains a fond memory, and for others, it’s an exciting new retro discovery. But how do you relive those glorious gaming moments in this age of ultra-modern, high-definition TVs?
This guide aims to answer that question and more. We’ll walk you through a step-by-step process to connect your Atari 2600 to a modern TV, allowing you to dive back into the world of Space Invaders, Pac-Man, and Pitfall! Whether you’re a veteran gamer or a newcomer to the Atari scene, we’ve got you covered.
Before we start, here’s a quick overview of what we’ll cover:
- What You Need: We’ll list the essentials you need for setting up your Atari 2600 with a modern TV.
- Step-by-Step Guide: A detailed guide on how to connect your console to the TV, including photos and tips to help you along the way.
- Smart TV Setup: Specific instructions for those of you using Smart TVs.
- Troubleshooting: Some handy tips to solve common issues that you might come across during the setup.
- Enhancing Your Experience: Suggestions on how to optimize your setup for the best possible gaming experience.
So, if you’re ready to journey back to the golden age of gaming, let’s get started!
Section 1: What You Need to Connect Atari 2600 to a Modern TV
Before we dive into the steps of connecting your Atari 2600 to a modern TV, it’s important to ensure you have all the necessary equipment. Here’s a list of what you’ll need:
- Atari 2600 Console: This one’s a given. Whether it’s been stored in your attic or you’ve just purchased it from a retro game store, make sure it’s in working condition.
- TV: Any modern TV should work for this setup. However, it’s essential to check that your TV has the correct ports. Most TVs will have an RCA or a coaxial port, which are the ones we’re interested in.
- RF to Coaxial Adapter: The Atari 2600 uses an RF connector, while most modern TVs use a coaxial connector. This adapter will allow the two to connect.
- RCA Cable: This will be used to connect your Atari 2600 to the RF adapter.
- Power Supply: Ensure you have the correct power supply for the Atari 2600. Using an incorrect one could potentially damage the console.
Here’s a simple table for reference:
| Equipment | Notes |
|---|---|
| Atari 2600 Console | Ensure it’s in working condition |
| TV | Must have an RCA or a coaxial port |
| RF to Coaxial Adapter | Needed to connect the Atari 2600’s RF connector to the TV’s coaxial port |
| RCA Cable | Connects the Atari 2600 to the RF adapter |
| Power Supply | Must be the correct type for the Atari 2600 |
Now that you have all your equipment ready, let’s move on to the initial setup of your gaming station..
Section 2: Initial Setup
Setting up your gaming station properly can make the whole process smoother and more enjoyable. Here are a few steps to get you started:
1. Placement of Atari 2600 and TV
Firstly, decide where you want to set up your Atari 2600. It should be close to your TV and power source. Ensure that the console is placed on a stable, flat surface. You don’t want it falling over during an intense gaming session!
2. Checking the TV’s Available Ports
Next, check the back of your TV to identify the available ports. For our purposes, we’re interested in either the RCA port (usually yellow, red, and white) or the coaxial port (usually a single round port that screws on). Identifying the right port is crucial because it will determine how we connect the Atari to the TV.
3. Selecting the Correct Adapter
Depending on the available port on your TV, you will need an RF to RCA or RF to coaxial adapter. This adapter bridges the gap between your modern TV and the vintage Atari 2600.
That’s it for the initial setup! We’re now ready to get into the actual connection process.
Section 3: Step-by-Step Guide to Connecting Atari 2600 to a Modern TV
Now that we’re done with the initial setup, let’s dive into the step-by-step process of connecting your Atari 2600 to your modern TV.
Step 1: Connecting the Atari to the Adapter
The Atari 2600 comes with an RF cable attached to it. This cable needs to connect to your RF adapter.
- If you’re using an RF to RCA adapter, connect the Atari’s RF cable to the adapter, then use your RCA cable to connect the adapter to your TV’s RCA port.
- If you’re using an RF to coaxial adapter, simply screw the Atari’s RF cable onto the adapter’s coaxial input.
Step 2: Hooking Up the Adapter to the TV
Now that your Atari 2600 is connected to the adapter, it’s time to connect the adapter to the TV.
- If you’re using an RCA adapter, match the color-coded RCA cables to the corresponding RCA ports on your TV.
- If you’re using a coaxial adapter, screw the adapter onto the coaxial port on your TV.
Step 3: Powering Up the System
With all the connections made, it’s time to power up. Plug the Atari 2600’s power supply into a power outlet and switch on the console.
Step 4: Selecting the Correct Channel or Input on the TV
The final step is selecting the correct channel or input on your TV.
- If you’re using an RCA connection, you’ll need to switch your TV’s input to “Composite” or “AV” mode.
- If you’re using a coaxial connection, switch your TV to channel 3 or 4 (try both to see which one works).
If everything has been done correctly, you should now see the Atari 2600’s welcome screen on your TV. Congratulations, you’re all set for a nostalgic gaming session!
Remember, the process might involve a bit of trial and error, especially if it’s your first time. Don’t be disheartened if it doesn’t work perfectly right away. With a bit of patience, you’ll have it running in no time.
Section 4: Connecting Atari 2600 to a Smart TV
While the process of connecting an Atari 2600 to a smart TV is similar to any other modern TV, there are a few additional steps you might need to take due to the advanced settings and options available on these devices.
1. Choosing the Correct Input Mode
Most smart TVs come with multiple input modes like HDMI, AV, Component, and more. After you’ve connected your Atari 2600 to the smart TV using either an RCA or coaxial adapter, you need to set the correct input mode.
- For RCA connections, select “AV” or “Composite” input on your smart TV.
- For coaxial connections, you’ll need to switch to the “Antenna” or “Cable” mode, then tune to channel 3 or 4.
2. Scanning for Channels
Some smart TVs may require you to scan for channels before it can receive the signal from the Atari 2600. You can typically do this from the “Antenna” or “Cable” settings on your TV. Follow your TV’s instructions to perform a channel scan.
3. Adjusting Display Settings
Smart TVs come with advanced display settings that can enhance your gaming experience. However, keep in mind that the Atari 2600 was designed for older TVs, so you might want to adjust settings like the aspect ratio to match the original look of the games.
For instance, changing the aspect ratio to 4:3 can give you a more authentic gaming experience as it matches the original format of Atari games.
With these steps, you should be able to enjoy your Atari 2600 games on your smart TV. As with all tech, your experience may vary based on the specific model of your smart TV, but these general steps should guide you in the right direction.
Section 5: Troubleshooting Common Issues
Despite our best efforts, technology can sometimes prove challenging. If you’re having difficulties getting your Atari 2600 to work with your modern TV, don’t worry. Here are some common issues and their potential solutions:
1. No Signal or “Snowy” Screen
If you’re seeing a “No Signal” message or a “snowy” screen, the issue is likely with the connection between the Atari 2600 and your TV.
- Double-check all your connections. Ensure the Atari’s RF cable is properly connected to the adapter, and the adapter is correctly hooked up to your TV.
- Try switching to the other channel. If you’re on channel 3, switch to channel 4, or vice versa.
- Make sure your TV is on the correct input mode (Composite/AV for RCA, Antenna/Cable for coaxial).
2. No Color or Incorrect Colors
If the game appears in black and white, or the colors seem off, the issue could be your TV’s settings.
- Check your TV’s color settings. You might need to adjust the color mode or saturation.
- Try a different game. If the color issue is only with one game, the problem might be with the game cartridge itself.
3. No Sound
If you can see the game but there’s no sound, try the following:
- Adjust the volume on both your TV and the Atari 2600.
- Check your TV’s audio settings. You might need to switch to mono audio mode if available.
- Try a different game. If the issue is only with one game, it could be a problem with the game cartridge itself.
4. Game Not Starting
If you’ve got everything hooked up, but the game isn’t starting:
- Ensure the game cartridge is properly inserted into the Atari 2600.
- Try removing and reinserting the cartridge. Old game cartridges can sometimes be finicky.
- Clean the game cartridge. Dust or dirt on the cartridge’s connectors can prevent it from working properly.
Remember, patience is key when dealing with vintage technology. With a bit of troubleshooting, you should be able to get your Atari 2600 up and running with your modern TV.
Section 6: Enhancing Your Gaming Experience
So, you’ve successfully connected your Atari 2600 to your modern TV. What’s next? Here are a few tips to enhance your gaming experience and take your retro gaming to the next level.
1. Playing Atari 2600 on HDTV
If you’re using an HDTV, you can adjust several settings to improve your gaming experience.
- Picture Mode: Most HDTVs come with various picture modes like “Cinema”, “Sports”, “Dynamic”, etc. For playing Atari 2600, you might want to use “Game” mode if your TV has it. This mode is designed to reduce input lag and can make the games more responsive.
- Aspect Ratio: Change the aspect ratio to 4:3 for a more authentic Atari 2600 gaming experience. This matches the original format of the games and can prevent them from looking stretched or distorted.
2. Using a Soundbar or Speakers
The audio output from older game consoles like the Atari 2600 can sometimes sound tinny or hollow on modern TVs. Consider connecting a soundbar or speakers to your TV for a richer and fuller sound.
3. Exploring Different Games
One of the best ways to enhance your gaming experience is simply to play more games! The Atari 2600 has a vast library of games to choose from. Whether you’re into adventure, puzzles, sports, or action, there’s bound to be something for you.
4. Cleaning Your Atari 2600 and Games
Keep your Atari 2600 and game cartridges clean. Dust and dirt can interfere with the console’s performance. Use a soft cloth and a suitable cleaning solution to gently clean the console and the game cartridges.
By following these tips, you can enhance your Atari 2600 gaming experience on your modern TV. Whether you’re reliving childhood memories or discovering the joys of retro gaming for the first time, the most important thing is to enjoy the journey.
Conclusion
And there you have it! You’ve successfully journeyed through the process of connecting your Atari 2600 to a modern TV. Whether it’s a standard modern TV or a smart TV, you now have the know-how to set up your console, troubleshoot common issues, and enhance your gaming experience.
In this guide, we covered:
- Essential equipment needed for the setup
- A step-by-step guide to connecting your Atari 2600 to a modern TV
- Specific instructions for smart TVs
- Troubleshooting tips for common issues
- Suggestions for enhancing your gaming experience
The world of retro gaming is full of nostalgia, fun, and unique experiences. As technology advances, it’s important to remember the pioneering consoles like the Atari 2600 that paved the way for the video games we enjoy today.
By connecting your Atari 2600 to a modern TV, you’re not just setting up a gaming console; you’re preserving a piece of video game history. Enjoy your gaming sessions, explore different games, and most importantly, have fun!
Whether you’re a seasoned gamer or a beginner stepping into the captivating world of Atari 2600, we hope this guide has been helpful.
Frequently Asked Questions
- How do I connect my Atari 2600 to a modern TV?You can connect your Atari 2600 to a modern TV using an RF to RCA or RF to Coaxial adapter, based on the ports available on your TV. A detailed step-by-step guide can be found in this article.
- Can I connect an Atari 2600 to a smart TV?Yes, the process is similar to connecting to any modern TV. However, with a smart TV, you may need to select the correct input mode and potentially scan for channels.
- What if there is no signal or the screen is “snowy”?If you’re seeing a “No Signal” message or a “snowy” screen, the issue is likely with the connection between the Atari 2600 and your TV. You should double-check all your connections, switch to the other channel, and make sure your TV is on the correct input mode.
- How can I improve the color or sound on my Atari 2600 when connected to a modern TV?If the game appears in black and white, or the colors seem off, the issue could be your TV’s settings. Check your TV’s color settings. You might need to adjust the color mode or saturation. If you can see the game but there’s no sound, try adjusting the volume on both your TV and the Atari 2600, or check your TV’s audio settings.
- How can I enhance my Atari 2600 gaming experience on a modern TV?There are several ways to enhance your gaming experience, such as adjusting the display settings on your TV, using a soundbar or speakers, exploring different games, and keeping your Atari 2600 and game cartridges clean.