The Importance of Recapping for Older Electronics
The Amiga 1200 was a popular computer in the early 1990s, known for its advanced graphics and audio capabilities. However, like all electronics, it is subject to wear and tear over time.
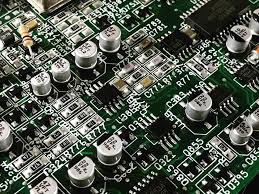
One of the most common problems with the Amiga 1200 is the failure of capacitors on the motherboard. These small components store electrical charge and filter out noise from power sources, but they can leak or explode over time due to age or environmental factors such as heat or humidity.
When capacitors fail, they can cause a variety of problems with electronic devices. Symptoms may include random crashes or freezes, distorted audio or video output, difficulty powering on or off, and other issues.
In extreme cases, capacitor failure can even damage other components on the circuit board. Recapping involves replacing these old capacitors with new ones of equivalent value.
This process can help restore proper function to older electronics and extend their usable lifespan. It is a common maintenance task for enthusiasts who collect vintage computers and game consoles.
Brief History of the Amiga 1200
The Amiga 1200 was introduced in late 1992 as an upgrade to the earlier Amiga 600 model. It was one of several models in Commodore’s long-running line of home computers (alongside other models such as the Amiga 500). The system featured a Motorola processor running at up to 14 MHz (depending on configuration), up to two megabytes of RAM (expandable), and integrated graphics and sound capabilities that were considered state-of-the-art at the time.
The Amiga line had a loyal following throughout its lifespan due to its powerful multitasking operating system (AmigaOS) and support for a wide range of creative software applications such as video editing and music production. However, it faced increasing competition in the home computer market from PCs and Macs, which eventually led to Commodore’s bankruptcy in 1994.
Overview of the Process
Recapping an Amiga 1200 involves removing the old capacitors from the motherboard (using a soldering iron and other tools) and replacing them with new ones of equivalent value. The process can be time-consuming, but it is generally straightforward for anyone with basic electronics knowledge and experience using a soldering iron.
Before beginning the recapping process, it is important to take safety precautions such as disconnecting power sources, wearing protective gear such as goggles or gloves, and ensuring that work areas are well-ventilated. It is also recommended to gather all necessary tools (such as screwdrivers and pliers) and materials (such as replacement capacitors) ahead of time.
During the recapping process itself, it is important to follow each step carefully to avoid damaging components or creating short circuits that could cause further issues with the system. Any mistakes made during this process can lead to costly damage or rendering your device useless.
Recapping an Amiga 1200 can help extend its lifespan by restoring proper function to its electrical components. It requires basic electronics knowledge, patience, safety precautions but with these considerations accounted for properly anyone can repair their own ageing electronics.
Tools and Materials Needed
List of Necessary Tools
Before starting the recapping process, it’s important to have the right tools on hand. You will need a set of screwdrivers, including a small flathead and Phillips head.
A pair of pliers will also be necessary for removing old capacitors. A soldering iron is needed for soldering new capacitors onto the motherboard.
It’s recommended that you have a desoldering pump or wick to help remove old solder from the board. Additionally, a pair of wire cutters may come in handy for trimming excess leads from new capacitors.
Types of Capacitors Needed for Recapping
The Amiga 1200 motherboard has several different types of capacitors that may need to be replaced during the recapping process. These include tantalum and electrolytic capacitors.
Tantalum capacitors are typically used in circuits that require high precision and low noise. They are often found near voltage regulators or power supplies in the Amiga 1200 and can be identified by their small size and cylindrical shape.
Electrolytic capacitors are larger than tantalum capacitors and come in various shapes such as radial (cylindrical) or axial (rectangular). They store large amounts of charge and are commonly used in power supply circuits.
Where to Purchase Materials
There are several online suppliers that offer capacitor kits specifically designed for recapping an Amiga 1200 motherboard. These kits usually contain all the necessary components needed for recapping, including both tantalum and electrolytic capacitors.
It’s important to purchase high-quality components from reputable suppliers to ensure proper functionality of your device after recapping. Some recommended suppliers include Digi-Key, Mouser Electronics, Jameco Electronics, and RS Components.
In addition to capacitor kits, you will also need to purchase a new battery for the motherboard’s real-time clock (RTC) to avoid leakage and potential damage to the board. It’s recommended that you purchase a lithium battery as it has a longer lifespan than traditional alkaline batteries.
Conclusion
Having the right tools and materials is crucial for successfully recapping an Amiga 1200. The list of necessary tools includes screwdrivers, pliers, soldering iron, desoldering pump/wick, and wire cutters.
Tantalum capacitors are smaller and used in circuits that require precision while electrolytic capacitors are larger and commonly used in power supply circuits. It’s important to purchase high-quality components from reputable suppliers when purchasing capacitor kits or replacement batteries for the RTC.
Digi-Key, Mouser Electronics, Jameco Electronics, and RS Components are all trusted suppliers with quality products. In the next section of this guide, we will cover how to prepare your Amiga 1200 for recapping by taking safety precautions during disassembly.
Preparing the Amiga 1200 for Recapping
Safety Precautions to Take Before Opening the Device
Before opening up your Amiga 1200, it is important to take certain safety precautions in order to avoid any injury or damage to the device. First and foremost, ensure that the device is unplugged from all power sources and has been turned off for at least an hour. This will allow any remaining electrical charges to dissipate.
Next, ground yourself before handling any of the internal components. A static discharge can fry delicate electronic parts, so use an anti-static wrist strap or touch a grounded metal object before touching anything inside the device.
It is also important to work in a well-ventilated area since some of the capacitors may contain harmful chemicals. Wear protective gloves and goggles if needed.
Steps to Disassemble the Device Safely
Once you have taken all necessary safety precautions, you can begin disassembling your Amiga 1200. Start by removing any screws holding the device together using appropriate screwdrivers.
Be sure to keep track of which screws go where as some may be different sizes. After removing all screws, carefully lift off any covers or panels on the device until you have access to its internal components.
It’s best to take photographs along each step so that you remember where everything goes when it’s time for reassembly. Be cautious not to apply too much force when removing parts as they may be attached by clips or other delicate mechanisms that could break easily.
Identifying and Locating Capacitors That Need Replacing
The next step is locating and identifying which capacitors need replacing. Capacitors can often leak or bulge over time which makes them easy to identify visually.
Check for visible damage such as discoloration or swelling on top of each capacitor; these are the ones that need to be replaced. If you are unsure which capacitors need replacing, there are online guides and tutorials available with detailed images that can assist you in identifying them.
It’s best to replace all capacitors at once, as even those that appear to be in good condition may fail soon after recapping. Once you have identified which capacitors require replacement, it’s time to purchase the necessary materials before moving on to the next step of the process.
Recapping Process
Step-by-step guide on how to remove old capacitors
Recapping an Amiga 1200 can be a challenging task, but with the right tools and knowledge, it is possible to complete it successfully. The first step in the recapping process is to remove the old capacitors from the motherboard.
To do this, you will need a soldering iron and some desoldering braid. Start by heating up your soldering iron and apply it to one of the capacitor legs.
This will melt the solder, allowing you to remove the capacitor easily. Repeat this process for all of the capacitors on your motherboard.
However, some capacitors can be difficult to remove due to their close proximity to other components or because they are located in hard-to-reach places on the board. In these cases, you may have to use a desoldering braid or pump to remove excess solder before attempting to lift off the capacitor.
How to solder new capacitors onto the motherboard
After removing all of the old capacitors from your Amiga 1200’s motherboard, it’s time to start installing new ones. You should have already ordered replacement capacitors at this point. Begin by identifying where each new capacitor needs to be placed on your motherboard.
Capacitor placement can vary between different models of Amiga 1200s and revisions of motherboards. Next, heat up your soldering iron again and apply some fresh solder onto one of the two pads (or holes) where each capacitor will be placed.
Then place one leg of each capacitor into its corresponding pad/hole and hold it there while heating up both with your iron until they fuse together securely. Repeat this process for all capacitors in turn until everything has been installed correctly according to their respective placements as identified earlier during diagnosis/dismantling.
Tips on how to avoid common mistakes during the process
Recapping an Amiga 1200 can be a tricky job, especially if you are new to soldering and electronics. Here are some tips to help you avoid some of the most common mistakes:
1. Keep your work area clean and tidy: It’s important to keep your workspace free from clutter and dust to prevent accidental damage or contamination. 2. Take breaks frequently: Soldering can be a tiring job, so take regular breaks to give your eyes and hands a rest.
3. Double-check your work: Before moving on to the next capacitor, make sure that the previous one has been installed correctly and is not touching any other components or pads. 4. Use the right tools: Using the wrong tool for the job can cause damage to both your Amiga 1200’s motherboard and yourself, so always use appropriate tools when working on electronics.
5. Be patient: Don’t rush through recapping your Amiga 1200 as this can cause more harm than good in many cases! Take your time with each step and don’t force anything into place that doesn’t want or need it – it could cause irreparable damage!
Testing and Reassembling
How to test if everything is working properly after recapping
After recapping your Amiga 1200, it’s essential to make sure that everything is working correctly. This process involves testing the device to check its various components, such as the power supply, screen display, sound output, floppy disk drive, and other hardware functions. The first step in testing is to power on the device.
If you hear a beep or see a green light on your monitor, it’s an indication that the Amiga 1200 has booted up correctly. Check if all drive activity lights are functioning correctly; this will ensure that all the drives are connected properly and functioning well.
You can also check if there are any visible issues with the screen display or sound output. Check for flickering or distortion in the image on your monitor and listen for any distortions in sound quality.
If there are any problems with these components, it may be an indication of a faulty capacitor still present in your device. Another way to test if your Amiga 1200 is functioning correctly after recapping is by loading software or games onto it.
This will allow you to test out the various hardware components simultaneously. It’s important not to skip this step since issues with certain hardware components may only become apparent during software or game usage.
If any issues pop up during testing, open up your Amiga 1200 again and double-check all of your work. Make sure all new capacitors have been fitted correctly and securely soldered onto their respective places on the motherboard.
Reassembling the device safely
After confirming that everything works as expected post-recapping process; proceed with reassembling your Amiga 1200 safely. The first step is to reattach the keyboard, disk drive, and mouse to the motherboard.
Make sure all cables are correctly connected and inserted into their respective ports. Be careful not to apply excessive force when inserting cables as this may damage the device.
Next, place the motherboard back into the casing, making sure that all screw holes align correctly with those on your casing. Insert screws back into their respective places gradually and gently tighten them with a screwdriver until they are secure – do not tighten them excessively.
Attach any remaining components such as additional hardware cards or external drives onto your Amiga 1200 before closing up the device’s case completely. Your Amiga 1200 is now ready for use!
Testing and reassembling are critical steps in recapping your Amiga 1200. By following these steps carefully and thoroughly checking your work at each stage of the process will ensure that everything works as expected while also providing longevity for your beloved device.
Conclusion
Summary of key points covered in this guide
In this comprehensive guide, we have covered the importance of recapping an Amiga 1200 as well as the step-by-step process involved. We began with a brief history of the Amiga 1200 and highlighted how it is still relevant today, followed by a list of necessary tools and materials required for the job. We then outlined how to prepare the Amiga 1200 safely for recapping and identified where to locate capacitors that need replacing.
Next, we discussed the detailed process involved in recapping an Amiga 1200, including tips on how to avoid common mistakes during the process. We explained how to test if everything was working correctly after recapping and reassembling the device.
Overall, this guide provides a complete walkthrough of what it takes to recap an Amiga 1200 successfully. By following these steps carefully, you can ensure that your device will continue to function correctly for years to come.
Final thoughts on why recapping is important for preserving older electronics
Recapping is crucial when it comes to preserving older electronics such as an Amiga 1200. Capacitors have a limited lifespan and tend to degrade over time; therefore, they require replacement at regular intervals. By neglecting this process, your electronic device not only begins malfunctioning but also poses serious safety risks due to leaking electrolytes or explosions in some cases.
Recapping your device not only ensures its longevity but also prevents further damage from occurring down the line. Furthermore, by taking care of aging electronic devices such as these time-machine like computers through proper maintenance techniques like recaping you’re doing your part in preserving technological advancements made over past decades or even centuries gone by.
It’s essential always to keep abreast with relevant developments within technology so that we may provide proper care and maintenance to older devices, keeping them functional for years to come. Recapping an Amiga 1200 may seem like a daunting task at first, but it is an essential step in preserving its longevity.
By following the steps outlined in this guide and taking safety precautions, you can ensure that your device will continue to function correctly for years to come. So take up this challenge and give new life into an old