Introduction
As a classic home computer from the 80s, the ZX Spectrum +3 holds a special place in the hearts of many retro computer enthusiasts. It was released in 1987 as an upgrade to the popular ZX Spectrum line and offered improvements such as a built-in floppy drive and increased RAM.
However, like any vintage tech, it may require some upgrades to stay relevant and functional in today’s world. That’s where mods come in.
Brief History of ZX Spectrum +3
The ZX Spectrum +3 was the final model in the Sinclair range of machines before Amstrad took over. It was launched after a difficult period for Sinclair Research which saw their previous machine, the Sinclair QL, fail to hit sales targets due to various technical problems. The new machine was designed to address these issues and provide users with an easy-to-use system that would be both affordable and reliable.
One of the most significant upgrades that came with the ZX Spectrum +3 was its built-in floppy drive. This replaced the tape loading mechanism that had been used on previous models and made it much easier for users to load software onto their machines without having to endure lengthy loading times or workarounds.
Additionally, it featured increased RAM from 48k up to 128k. Despite being well-received by fans at its release, sales figures were not as high as hoped due to stiff competition from other machines such as Commodore Amiga and Atari ST.
Explanation of Mods And Their Benefits
Mods are modifications made to hardware or software that change how a device operates or adds new features not originally included by manufacturers. These can range from basic upgrades such as adding more RAM or replacing parts with modern equivalents, all the way up to more complex projects like installing Wi-Fi capabilities or custom sound chips. Fortunately, the ZX Spectrum +3 is a machine that lends itself well to mods due to its open architecture and the availability of technical documentation.
By adding different mods, users can improve performance, access new features, and enhance their overall experience with the machine. The benefits of mods are numerous.
Upgrades such as adding more RAM can allow for faster loading times and smoother gameplay while installing a new power supply can help avoid potential damage from power surges. Advanced mods like adding an IDE interface or VGA output can provide users with faster storage options and improved video quality not originally possible on the machine.
Mods are a great way to breathe new life into your ZX Spectrum +3 and make it more functional for modern use. In the following sections, we will explore some of the most popular mods available for this classic home computer.
Basic Mods
Upgrading RAM
One of the most straightforward mods for a ZX Spectrum +3 is upgrading the RAM. This will allow the computer to run more complex programs and games without experiencing slowdowns or crashes. The ZX Spectrum +3 originally came with 128KB of RAM, but this can be upgraded to 512KB or even 1MB with little effort.
There are several methods to upgrade the RAM, from soldering additional chips onto the motherboard to using external RAM expansion modules that connect through the edge connector on the back of the computer. For those with some technical expertise, adding additional chips directly onto the motherboard is a viable option.
However, for those not comfortable with soldering or modifying their motherboard in any way, using an external RAM expansion module is a much simpler solution. These modules can be purchased online and easily plugged into the edge connector on your ZX Spectrum +3.
Replacing floppy drive with Gotek drive
The floppy disk drives used in older computers like ZX Spectrum +3 are becoming increasingly difficult to find and maintain due to their age. Replacing your old floppy disk drive with a Gotek drive is an excellent alternative that eliminates many potential problems associated with aging hardware while still allowing you to load games and programs from floppy disk images. A Gotek drive emulates a traditional floppy disk drive by reading data from USB flash drives instead of actual disks.
This allows you to store all your favorite games and software on a single flash drive rather than requiring multiple physical disks. Installation is relatively simple- remove your old floppy disk drive and install your new Gotek replacement in its place.
Installing a new power supply unit
The original power supply unit that came with your ZX Spectrum +3 may not be up to today’s safety standards as it was made back when electrical safety regulations were not as strict or well-understood as they are now. Replacing the power supply unit is a highly recommended mod to ensure your computer’s continued longevity and safety. There are several third-party power supplies available online that provide better protection against electrical surges, voltage fluctuations, and other potential hazards.
These new power supplies also come with updated connectors to ensure compatibility with modern electrical outlets. Installing your new power supply unit is usually a simple matter of removing the old one and plugging in the new one.
Conclusion
These three basic mods can significantly improve your ZX Spectrum +3’s functionality and reliability while still retaining its classic aesthetics. Upgrading RAM will allow you to run more complex programs and games without crashing, replacing your floppy disk drive with a Gotek drive provides more convenient storage options, and installing a newer power supply unit ensures safety standards compliance for continued use of your computer. By following these steps, you’ll be able to breathe new life into this classic computer for years to come!
Advanced Mods
Adding an IDE interface for faster storage options
If you’re looking for faster storage options on your ZX Spectrum +3, adding an IDE interface can help improve the speed and efficiency of your computer. This mod allows you to connect an IDE hard drive or CompactFlash card to your computer, enabling you to store more files and access them more quickly.
The process involves soldering the IDE connector onto the motherboard, which requires some expertise and patience. Once installed, you’ll need to format the hard drive or CompactFlash card using a program like FDISK.
You can then install software from a disk image using a utility like IMD. Having an IDE interface also allows you to use more modern accessories such as USB floppy drives or USB sticks with appropriate USB converters that will ultimately lead to better user experience.
Installing a VGA output for better video quality
If you’re not happy with the video output of your ZX Spectrum +3 on modern monitors or TVs, installing a VGA output can help improve image quality significantly. VGA offers higher resolution and refresh rates than composite video signal which can result in much sharper text and graphics display. This mod involves connecting wires between specific points on the ZX Spectrum +3’s motherboard and a VGA connector that is mounted outside of Your ZX Spectrum’s case.
The process is relatively complex but there are clear guides available online that can guide through it step-by-step, essentially anyone with basic electrical knowledge should be able to perform this modification without harming their device. You’ll also need to make some changes in software settings (e.g., disabling color clash) so that images are displayed properly on a VGA monitor.
Upgrading the sound capabilities with an AY-8912 sound chip
If you’re a music lover or game enthusiast, upgrading your ZX Spectrum +3 with an AY-8912 sound chip can be a great way to enhance the audio experience. The AY-8912 is a programmable sound generator that was used in many arcade games and home computers from the 1980s and 1990s. This mod involves soldering the AY-8912 chip onto the ZX Spectrum +3’s motherboard.
Once installed, you’ll need to modify software settings to enable applications to access and utilize this enhanced sound capability. The upgraded sound capabilities can improve game sounds such as explosions and gunfire, as well as provide a richer experience when listening to music on your computer.
Conclusion
Advanced mods offer significant enhancements for your ZX Spectrum +3, improving its processing power, video display quality, and sound capabilities. Installing these advanced mods requires expert-level soldering skills coupled with adequate knowledge of electrical engineering principles.
If you have never performed this type of modification before or if you’re unsure about it – do not hesitate to ask for help from people who have already carried out similar modifications in online forums or local retro-computing clubs With caution, patience, and attention to detail – these modifications will transform your ZX Spectrum +3 into an even more formidable retro computing machine that will continue giving joy and entertainment for years after its original “retirement”.
Niche Mods
Wireless Spectrum: Adding Wi-Fi Capabilities with a Raspberry Pi Zero W
As the world becomes increasingly connected, many Spectrum enthusiasts find themselves wishing for a way to connect their beloved old computer to the internet. Fortunately, a Raspberry Pi Zero W can be added to the ZX Spectrum +3 to enable Wi-Fi and internet connectivity.
This mod requires some soldering and configuration, but the benefits are well worth it. The first step is to obtain a Raspberry Pi Zero W and prepare it for use as an access point.
Next, we need to solder some wires from the GPIO pins of the Raspberry Pi Zero W onto the circuit board of our ZX Spectrum +3. Additionally, we will need to install some software that will enable us to configure our wireless network connection.
Once these steps are complete, we can enjoy using our favorite ZX Spectrum programs while connected to the internet. This opens up new possibilities for downloading games and applications from online repositories, or even sharing files with other computers over a network.
Loading Games Made Easy: Installing an SD Card Reader
The ZX Spectrum +3 was designed in an era when floppy disks were still the most common storage medium for computers. However, modern users may find these disks difficult or expensive to obtain. To address this issue, an SD card reader can be installed in place of one of the floppy drives.
This mod requires some basic soldering skills and knowledge of how floppy drives work. The process involves removing one of the floppy drives from your ZX Spectrum +3 and replacing it with an SD card reader module.
You’ll also need software that enables you to transfer game images onto your SD card. This modification makes loading games much easier than before since you don’t have to worry about finding the right floppy disks.
Using an SD card, you can store thousands of games and applications in one small package. This is a great way to preserve your favorite Spectrum software for years to come.
Timeless Computing: Adding an RTC for Accurate Timekeeping
The ZX Spectrum +3 does not have any built-in clock or calendar functionality, which makes it difficult to keep track of time accurately. Fortunately, we can add a Real Time Clock (RTC) module to our computer that will keep the correct time even when the computer is turned off. The process of installing an RTC involves soldering some wires onto the motherboard and connecting them to a small module that contains a battery backup and clock chip.
Once connected, this module will keep track of both time and date whenever the computer is powered on. This modification may seem trivial, but it has practical benefits beyond simply knowing what time it is.
Many programs rely on accurate date and time information, such as scheduling or managing files by creation date. With an RTC installed in your ZX Spectrum +3, you won’t have to worry about these issues anymore.
Rarely Known Small Details
The importance of using high-quality capacitors in mods to prevent damage to the motherboard
One of the most important aspects of ZX Spectrum +3 mods is ensuring that you are using high-quality capacitors when making modifications. Capacitors are responsible for storing and releasing electrical energy within a circuit, which makes them an essential part of any electronic device.
However, not all capacitors are created equal, and low-quality ones can be prone to failure or even explode under certain conditions. When carrying out a modification that involves replacing or adding capacitors, it is essential to choose ones that have a suitable capacitance rating and voltage rating for your specific needs.
Additionally, look for reputable brands that have a proven track record in the industry. Using cheap or unknown brand capacitors might save you money in the short term but can cause significant damage to your ZX Spectrum +3 over time.
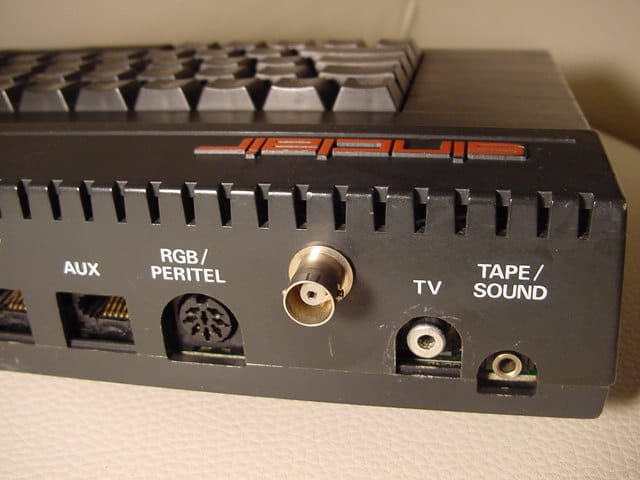
The difference between PAL and NTSC video modes on the ZX Spectrum +3
The ZX Spectrum +3 supports two different video modes: PAL and NTSC. PAL stands for Phase Alternating Line and is used mainly in European countries, while NTSC stands for National Television System Committee and is used mostly in North America and Japan.
The primary difference between these two systems lies in how they handle color information. PAL displays 625 lines per frame at 50 Hz while NTSC displays 525 lines per frame at 60 Hz. As a result, colors on PAL devices tend to be more natural-looking than on NTSC devices due to the higher resolution.
When modifying your ZX Spectrum +3, it’s crucial to understand which video mode your device uses so that you can choose appropriate modifications accordingly. Many modders prefer working with PAL because it provides better color accuracy; however, if you’re planning on using your device primarily with an NTSC television, then you may want to focus on mods that improve the NTSC output quality.
The benefits of using heatsinks on certain components during mods
Heatsinks are used in electronic devices to help dissipate heat away from critical components like processors and voltage regulators. When carrying out ZX Spectrum +3 modifications, certain components can generate a lot of heat, especially when overclocked or running at higher voltages than they were designed for. Installing heatsinks can help improve system stability and prevent damage to these sensitive parts.
It’s important to choose the right size and shape of heatsink for each component you’re working with. Additionally, you’ll need to use thermal paste or pads to ensure proper contact between the heatsink and the component.
When installing heatsinks during your modding process, be sure to keep an eye on temperatures after completing your build. If temperatures remain high despite the addition of heatsinks, it might be necessary to add additional cooling methods such as fans or liquid cooling systems.
Conclusion
While these details might seem small compared to some of the significant modding projects you can undertake with your ZX Spectrum +3, they’re essential considerations for ensuring that your device remains stable and functional over time. By prioritizing high-quality capacitors, understanding video modes and using appropriate heatsinks during modifications, you’ll be able to maximize performance while minimizing risk. So go ahead and get started on your mods – just remember that attention to detail is key!
Conclusion
Summary of all the different types of mods available for ZX Spectrum +3
In this article, we have discussed various mods that can be done to enhance the performance and features of the ZX Spectrum +3 computer. We have divided these mods into three categories: Basic, Advanced, and Niche. Basic mods include upgrading RAM, replacing floppy drives with Gotek drives, and installing new power supply units.
Advanced mods include adding an IDE interface for faster storage options, installing a VGA output for better video quality, and upgrading sound capabilities with an AY-8912 sound chip. Niche Mods include adding Wi-Fi capabilities with a Raspberry Pi Zero W or installing an SD card reader to load games and software easily.
Importance of careful consideration before attempting any mod
It is important to note that modding any electronic device carries a risk of damage or failure if not done correctly. Before attempting any mod on your ZX Spectrum +3 computer, it is crucial to research thoroughly and understand the process involved in each mod type.
Take things one step at a time – don’t try taking on too much at once without fully understanding each component you are working on. Always make sure you have all the necessary tools available before beginning any modifications to your device.
This includes safety equipment such as gloves, protective eyewear, heat sinks where possible etc. We advise that beginners start with basic mods first before proceeding onto more advanced ones which require higher technical skill levels.
Encouragement to share knowledge and experiences with fellow enthusiasts
Not only does sharing knowledge about different modifications allow enthusiasts to connect over their shared interest in vintage computing technology; it also helps others learn from mistakes or successes – helping everyone involved get more out of their devices! Sharing experiences openly about your own modifications can also be very helpful for beginners who are looking to learn more about the possibilities of modding their ZX Spectrum +3 computers.
It is also a great way to get tips and advice from other enthusiasts who have already tried similar modifications. With so many people diving into the world of homebrew computer modifications, the pool of knowledge grows ever larger – and this can only be a good thing for everyone involved!
While modding your ZX Spectrum +3 computer may seem daunting at first, it is an excellent way to breathe new life into an old machine. With careful consideration, proper research, and attention to detail combined with sharing knowledge with other enthusiasts – your computer can be transformed into something quite special!