Welcome to the complete EmulationStation setup guide! Whether you’re a retro gaming enthusiast looking to relive childhood memories or a newcomer curious about classic games, this comprehensive guide will walk you through everything you need to know about setting up EmulationStation.
EmulationStation serves as the perfect retro gaming frontend, transforming your device into a nostalgic gaming powerhouse. From Raspberry Pi gaming setups to Windows installations, we’ll cover all the essential steps to get you playing your favorite classic games in no time.

Table of Contents
What is EmulationStation?
EmulationStation is a powerful, open-source frontend designed specifically for managing and launching retro game emulators. Think of it as a beautiful, user-friendly interface that sits between you and your collection of classic games, making it easy to browse, organize, and play titles from multiple gaming systems.
Originally developed as part of the RetroPie project, EmulationStation has evolved into a standalone application that can work with various emulator backends. It provides a console-like experience that feels natural when using game controllers, making it perfect for living room gaming setups.
🎮 Multi-System Support
Supports dozens of gaming systems from Atari 2600 to PlayStation, all in one unified interface.
🎨 Customizable Themes
Beautiful, customizable themes that can transform the look and feel of your gaming experience.
🕹️ Controller-Friendly
Designed from the ground up to work seamlessly with game controllers and TV displays.
📊 Game Metadata
Automatic scraping of game information, artwork, and videos to create a rich browsing experience.
Key Features of EmulationStation
- Unified Game Library: Browse games from multiple systems in one organized interface
- Automatic Game Detection: Scans your ROM directories and organizes games by system
- Rich Media Support: Displays game artwork, screenshots, and video previews
- Favorites System: Mark and quickly access your most-played games
- Search Functionality: Find games quickly across your entire collection
- Customizable Collections: Create custom game lists based on genre, rating, or personal preference
- Multiple View Modes: Switch between detailed lists, simple lists, and grid views
- Screensaver Support: Configurable screensavers with game videos or slideshows
Why Use EmulationStation for Retro Gaming
The retro gaming landscape offers numerous frontend options, but EmulationStation stands out as the gold standard for several compelling reasons. Its combination of ease of use, powerful features, and active community support makes it the ideal choice for both beginners and experienced users.
Unlike standalone emulators that require individual configuration and management, EmulationStation provides a cohesive experience that brings all your retro games under one roof. This unified approach eliminates the frustration of juggling multiple applications and creates a seamless gaming experience.
Advantages Over Other Frontends
| Feature | EmulationStation | Standalone Emulators | Other Frontends |
|---|---|---|---|
| Setup Complexity | Medium | High | High |
| Controller Support | Excellent | Varies | Good |
| Theme Customization | Extensive | None | Limited |
| Community Support | Very Active | Fragmented | Moderate |
| Multi-System Management | Excellent | Poor | Good |
| Media Scraping | Built-in | Manual | Varies |
Perfect Use Cases for EmulationStation
- Living Room Gaming: Transform your TV into a retro gaming console with controller-friendly navigation
- Raspberry Pi Projects: The cornerstone of RetroPie, making single-board computers into gaming powerhouses
- Family Gaming: Easy-to-use interface that children and non-technical users can navigate effortlessly
- Game Preservation: Organize and preserve large collections of classic games with proper metadata
- Custom Arcade Cabinets: Professional-looking interface perfect for DIY arcade builds
- Portable Gaming: Excellent for handheld devices and portable gaming setups
💡 Pro Tip
EmulationStation works best when you have a good collection of ROMs already organized in folders by system. Spend time organizing your game files before installation for the smoothest setup experience.
Step-by-Step Setup Guide
Setting up EmulationStation varies depending on your platform and intended use case. We’ll cover the most popular installation methods, starting with the beginner-friendly RetroPie approach and moving to more advanced standalone installations.
Before we begin, ensure you have the necessary hardware and software requirements. Most modern computers can run EmulationStation, but performance will vary based on the emulators you plan to use and the systems you want to emulate.

Method 1: RetroPie Installation (Recommended for Beginners)
RetroPie is the easiest way to get EmulationStation running, especially on Raspberry Pi devices. This method provides a complete, pre-configured package that includes EmulationStation, RetroArch, and dozens of emulators ready to use.
⚠️ Requirements
You’ll need a Raspberry Pi (3B+ or newer recommended), microSD card (32GB minimum), and a reliable power supply. Don’t forget HDMI cable, USB keyboard, and game controller.
Step-by-Step RetroPie Installation:
- Download RetroPie Image: Visit the official RetroPie website and download the latest image for your Raspberry Pi model. Choose the correct version (Pi 4, Pi 3/3B+, or Pi Zero).
- Flash the Image: Use Raspberry Pi Imager or Balena Etcher to write the RetroPie image to your microSD card. This process typically takes 10-15 minutes depending on your card speed.
- First Boot Setup: Insert the SD card into your Pi, connect peripherals, and power on. EmulationStation will start automatically and prompt you to configure your controller.
- Controller Configuration: Hold any button on your controller when prompted. Follow the on-screen instructions to map all buttons. This creates a controller profile for both EmulationStation and RetroArch.
- Add ROMs: Either use a USB drive to transfer ROM files or set up network file sharing. Place ROMs in the appropriate system folders (e.g., /home/pi/RetroPie/roms/nes/ for NES games).
- Restart EmulationStation: Press Start → Quit → Restart EmulationStation to detect your newly added games. Systems with games will now appear in the main menu.
Method 2: Windows Installation
For Windows users who want to use EmulationStation on their PC, the standalone installation offers more flexibility and often better performance than Raspberry Pi setups. This method requires more manual configuration but provides greater customization options.
Windows Installation Steps:
- 1Download EmulationStation: Get the latest Windows build from the official GitHub repository or a trusted community build like RetroBat or Batocera for Windows.
- 2Install Dependencies: Install Visual C++ Redistributables and DirectX if not already present. Most modern Windows installations already have these components.
- 3Setup Directory Structure: Create folders for ROMs organized by system (e.g., C:\Emulation\roms\snes\, C:\Emulation\roms\genesis\).
- 4Configure Emulators: Install and configure individual emulators like RetroArch, or use a pre-configured package that includes popular emulators.
- 5Edit es_systems.cfg: Configure the systems configuration file to point to your ROM directories and emulator executables. This file defines which emulators launch for each system.
- 6Add ROMs and Test: Place ROM files in appropriate directories and launch EmulationStation to test functionality. Use the built-in scraper to download game metadata and artwork.
💡 Windows Pro Tip
Consider using RetroBat or similar all-in-one packages for Windows. These provide EmulationStation with pre-configured emulators and simplified setup processes, similar to RetroPie’s convenience.
Method 3: Linux Installation
Linux users have several options for installing EmulationStation, from distribution packages to compiling from source. Ubuntu and Debian users can often install via package managers, while other distributions may require manual compilation.
# Ubuntu/Debian installation sudo apt update sudo apt install emulationstation # Or compile from source git clone https://github.com/RetroPie/EmulationStation.git cd EmulationStation mkdir build && cd build cmake .. && make -j$(nproc) sudo make install
Essential Configuration Files
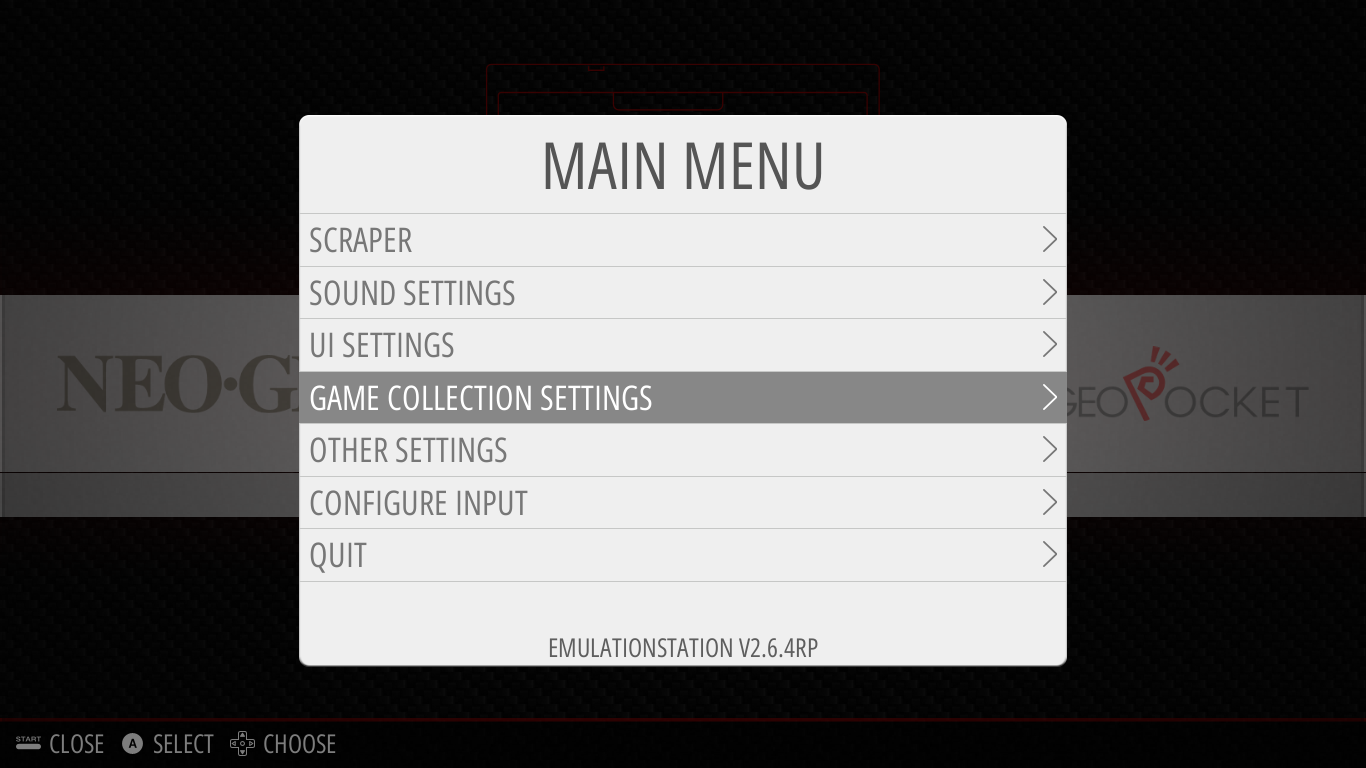
Understanding EmulationStation’s key configuration files helps with troubleshooting and customization. These files control system definitions, input mapping, and UI settings.
- es_systems.cfg: Defines available game systems, ROM paths, and emulator commands
- es_input.cfg: Stores controller configuration and button mappings
- es_settings.cfg: Contains UI preferences, screensaver settings, and other options
- gamelists/*.xml: Game metadata files created by the scraper or manual editing
Best Themes and Controller Configs
One of EmulationStation’s greatest strengths lies in its extensive customization options. Themes can completely transform the visual experience, while proper controller configuration ensures smooth gameplay across all systems.
The EmulationStation community has created hundreds of themes ranging from minimalist designs to elaborate animated experiences. Choosing the right theme depends on your hardware capabilities, personal preferences, and intended use case.

Top Recommended Themes
| Theme Name | Style | Performance Impact | Best For |
|---|---|---|---|
| Carbon | Dark, Modern | Low | All devices, great default choice |
| Clean | Minimalist | Very Low | Low-powered devices, clean aesthetics |
| ComicBook | Colorful, Fun | Medium | Family gaming, younger users |
| Pixel | Retro Pixel Art | Low | Nostalgic gaming setups |
| Art Book Next | Elegant, Detailed | High | Powerful devices, showcase setups |
Installing Themes
Theme installation varies by platform but generally involves downloading theme files and placing them in the appropriate directory. RetroPie users can install themes through the built-in theme installer in the RetroPie setup script.
RetroPie Theme Installation:
- Access RetroPie Setup from the main menu or via SSH
- Navigate to Configuration/Tools → EmulationStation
- Select “Install Themes” from the menu
- Choose your desired theme and wait for download/installation
- Apply the theme through EmulationStation’s UI Settings menu
Manual Theme Installation:
# Download theme to themes directory cd ~/.emulationstation/themes/ git clone [theme-repository-url] [theme-name] # Or for RetroPie: cd /etc/emulationstation/themes/ sudo git clone [theme-repository-url]
[theme-name]

Controller Configuration Best Practices
Proper controller setup is crucial for an enjoyable retro gaming experience. EmulationStation supports a wide variety of controllers, from modern Xbox and PlayStation controllers to specialized retro gaming pads and arcade sticks.
The key to successful controller configuration lies in understanding the difference between EmulationStation navigation controls and in-game emulator controls. EmulationStation uses its own button mapping for menu navigation, while individual emulators may have different control schemes.
Recommended Controllers for Retro Gaming:
- Xbox Series/One Controller: Excellent compatibility, great build quality, works wirelessly
- PlayStation DualShock 4/DualSense: Good compatibility, unique features like motion controls
- 8BitDo SN30 Pro+: Perfect for retro gaming with authentic button layout and modern features
- Nintendo Switch Pro Controller: Great build quality, works well with proper drivers
- Generic USB Controllers: Budget-friendly option, varies in quality and compatibility
Controller Setup Steps:
- 1Initial Configuration: When prompted by EmulationStation, hold any button to begin controller setup. Map each button according to the on-screen prompts.
- 2Test Navigation: Use the configured controller to navigate through EmulationStation menus. Ensure all directional inputs and action buttons work correctly.
- 3Per-Emulator Configuration: Some emulators may require additional controller configuration. Access emulator settings through the EmulationStation menu or in-game options.
- 4Save Controller Profiles: Create and save controller profiles for different game types (arcade, platformers, RPGs) to quickly switch between optimal control schemes.
💡 Controller Pro Tip
Map the “hotkey” button (usually Select) carefully. This button enables special functions like save states, quick exit, and emulator menu access when combined with other buttons during gameplay.
Advanced Theme Customization
For users who want to go beyond pre-made themes, EmulationStation supports extensive theme customization. You can modify existing themes or create entirely new ones using XML configuration files and custom artwork.
Theme customization involves editing XML files that define layout, colors, fonts, and image positions. While this requires some technical knowledge, the results can be highly personalized and unique to your setup.
Basic Theme Customization Elements:
- System View: The main system selection screen layout and appearance
- Basic View: Simple game list without metadata display
- Detailed View: Game list with description, rating, and metadata
- Grid View: Thumbnail-based game browsing interface
- Color Schemes: Text colors, background colors, and highlight colors
- Fonts: Typography choices for different UI elements
- Sound Effects: Audio feedback for navigation and selection
Troubleshooting Common Issues
Even with careful setup, EmulationStation users occasionally encounter issues ranging from performance problems to configuration conflicts. This troubleshooting section addresses the most common problems and provides step-by-step solutions.
Most EmulationStation issues fall into several categories: installation problems, controller configuration issues, ROM detection failures, performance concerns, and theme-related problems. Understanding these categories helps diagnose and resolve issues more efficiently.
Installation and Startup Issues
⚠️ Common Startup Problems
If EmulationStation fails to start or crashes immediately, check system requirements, file permissions, and configuration file syntax. Most startup issues relate to missing dependencies or corrupted configuration files.
EmulationStation Won’t Start:
- Check Dependencies: Ensure all required libraries are installed (SDL2, FreeImage, curl, etc.)
- Verify File Permissions: EmulationStation needs read/write access to its configuration directory
- Reset Configuration: Backup and delete ~/.emulationstation/ to reset all settings to defaults
- Check System Resources: Ensure adequate RAM and storage space for operation
- Review Log Files: Check ~/.emulationstation/es_log.txt for specific error messages
Black Screen or Display Issues:
# For Raspberry Pi display issues: # Edit /boot/config.txt and try these settings: hdmi_force_hotplug=1 hdmi_drive=2 hdmi_group=1 hdmi_mode=16 # For resolution problems: hdmi_ignore_edid=0xa5000080
Controller Configuration Problems
Controller issues are among the most frustrating problems for new users. These problems typically manifest as unresponsive controls, incorrect button mappings, or controllers that work in EmulationStation but not in games.
Controller Not Detected:
- Verify the controller is properly connected (USB firmly inserted, wireless paired)
- Check if the controller appears in system device lists
- Try a different USB port or wireless receiver
- Install controller-specific drivers if needed
- Test the controller with other applications to verify functionality
Controller Works in EmulationStation but Not in Games:
- RetroArch Configuration: Access RetroArch settings during gameplay (Hotkey + X) and configure input
- Emulator-Specific Settings: Some standalone emulators require separate controller configuration
- Input Driver Issues: Try different input drivers in RetroArch (udev, sdl2, xinput)
- Controller Index Problems: Ensure the controller is set as Player 1 in both EmulationStation and emulator settings
ROM Detection and Game Issues
ROM-related problems usually involve games not appearing in EmulationStation, incorrect game identification, or games failing to launch. These issues often stem from incorrect file organization, unsupported ROM formats, or missing BIOS files.
Games Not Appearing in EmulationStation:
| Problem | Cause | Solution |
|---|---|---|
| Empty system lists | ROMs in wrong directory | Verify ROM paths in es_systems.cfg |
| Some games missing | Unsupported file extensions | Check supported formats for each system |
| Newly added games invisible | Cache not refreshed | Restart EmulationStation or force refresh |
| Compressed ROMs not detected | Unsupported compression | Extract or use supported compression (zip, 7z) |
Games Launch but Don’t Work Properly:
- Missing BIOS Files: Many systems require BIOS files in the system directory (~/RetroPie/BIOS/)
- Incorrect Emulator: Try different emulators through the runcommand menu
- ROM Compatibility: Some ROM dumps may be incompatible with certain emulators
- System Resources: Complex games may require more powerful hardware or optimized settings
Performance Optimization
Performance issues can significantly impact the gaming experience, especially on lower-powered devices like Raspberry Pi systems. Optimization involves balancing visual quality with smooth gameplay performance.
Improving EmulationStation Performance:
- Reduce Theme Complexity: Use simpler themes with fewer animations and effects
- Limit Video Previews: Disable or reduce video screensavers and game videos
- Optimize Image Sizes: Use appropriately sized artwork to reduce memory usage
- Close Background Processes: Eliminate unnecessary services and applications
- Adjust GPU Memory Split: On Raspberry Pi, allocate more memory to GPU (raspi-config)
Game Performance Optimization:
# RetroArch performance settings: # Access via Hotkey + X during gameplay Settings → Video → Threaded Video: ON Settings → Video → Hard GPU Sync: OFF Settings → Audio → Audio Latency: 64ms Settings → Core → CPU Clock: Adjusted per game
Network and Scraping Issues
EmulationStation’s scraping feature downloads game metadata and artwork from online databases. Network issues or database problems can prevent proper game information display.
Scraper Not Working:
- Verify internet connectivity from your EmulationStation device
- Check if scraping services (ScreenScraper, TheGamesDB) are operational
- Try different scraping sources in EmulationStation settings
- Reduce concurrent scraping threads to avoid rate limiting
- Manual metadata entry as alternative to automatic scraping
🎮 Ready to Start Your Retro Gaming Journey?
With this comprehensive guide, you now have all the knowledge needed to set up EmulationStation and create an amazing retro gaming experience. Remember that the retro gaming community is incredibly helpful – don’t hesitate to seek assistance on forums like Reddit’s r/RetroPie or the official RetroPie forums.
Start with a simple RetroPie setup, add your favorite games, and gradually customize themes and settings to create your perfect retro gaming frontend!
Additional Resources and Community Support
The EmulationStation and retro gaming communities offer extensive resources for troubleshooting, customization, and ongoing support. These communities are welcoming to beginners and offer valuable assistance for complex configurations.
- Official Documentation: RetroPie.org.uk/docs for comprehensive guides and references
- Community Forums: RetroPie Forum and Reddit communities for peer support
- Video Tutorials: YouTube channels like ETA Prime and Retro Game Corps
- Theme Repositories: GitHub repositories with hundreds of community-created themes
- ROM Compatibility Lists: Databases showing which games work with specific emulators
Remember that retro gaming is about enjoying classic games and preserving gaming history. Take your time with the setup process, experiment with different configurations, and most importantly, have fun exploring the vast world of retro gaming through EmulationStation.
🚀 Final Pro Tip
Start small with your game collection and gradually add more systems and games. This approach helps you learn EmulationStation’s features progressively while avoiding overwhelming setup complexity. Focus on getting a few favorite systems working perfectly before expanding your retro gaming library.