Welcome to keyboard restoration! If you’ve got a yellowed, grimy old keyboard from your favorite vintage computer, you’re in the right place. We’ll show you how to bring your beloved input device back to life, step by step. This guide covers everything from understanding why keyboards turn yellow to advanced restoration techniques. Let’s turn that yellowed plastic into a clean keyboard that looks brand new, while keeping its vintage charm and usability!
Key Takeaways: Keyboard Restoration
- Keyboard yellowing is caused by bromine breakdown in plastic
- Disassembly and thorough cleaning are crucial first steps
- The “Retrobright” method uses hydrogen peroxide and UV light to reverse yellowing
- Sticky keys can be addressed with isopropyl alcohol
- Proper reassembly and maintenance are essential for longevity
- Restoration preserves vintage tech and enhances typing experience
Understanding Keyboard Yellowing
Before we start restoring, it’s important to know why keyboards turn yellow. Plastic yellowing often happens with older electronics, especially from the 1980s and 1990s. The cause is a flame retardant called bromine that was added to the plastic for safety reasons. But this had an unexpected long-term effect.
Over time, when exposed to UV light, the bromine in the plastic breaks down and causes that ugly yellow color we see. It’s not just dirt – it’s a chemical change in the plastic itself. That’s why just cleaning won’t fix it. This process changes the plastic’s color and sometimes even how it feels. Understanding this helps us know how to effectively reverse the yellowing and restore your keyboard.
Preparation: Gathering Your Tools
Before we start restoring, let’s make sure we have all the tools we need. Good preparation is key to doing a great job. Here’s a list of what you’ll need:
Essential Tools for Keyboard Restoration
- Hydrogen peroxide cream (12% or higher)
- Rubber gloves to protect your hands
- Safety goggles to protect your eyes
- Soft brush for gentle cleaning
- Screwdriver set for taking things apart
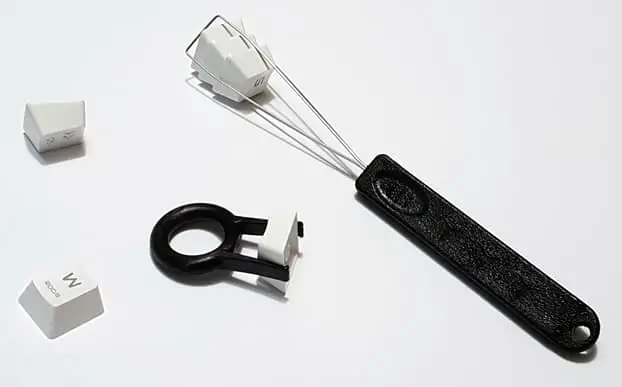
- Keycap puller or two plastic cards
- Plastic wrap to cover treated parts
- UV light source or access to sunlight
- Isopropyl alcohol (99%) for deep cleaning
- Soft cloths for wiping and polishing
- Cotton swabs for detailed cleaning
- Small containers for organizing parts
- Camera or phone for taking pictures
- Workspace lamp for better lighting
- Anti-static mat (if you have one)
Having these tools ready will make the restoration process easier. Always wear your gloves and goggles when using chemicals. The anti-static mat is helpful if you’re working with sensitive electronic parts. Taking pictures as you go can be really useful when you’re putting the keyboard back together.
Step 1: Taking Apart and Cleaning
The first step in restoring your keyboard is to take it apart and clean it thoroughly. This takes patience and attention to detail. Here’s how to do it:
- Unplug the keyboard and take out any batteries if it’s wireless. If you can, take a picture of the keyboard before you start taking it apart.
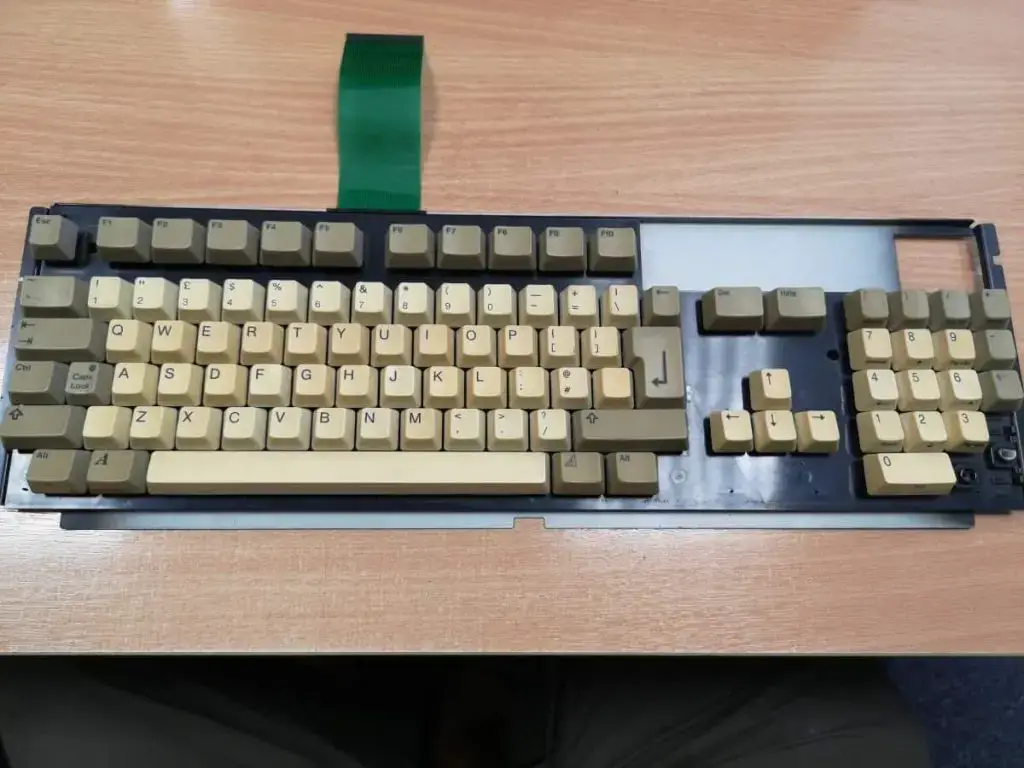
- Calling all keyboard aficionados. Does anyone have any advice/tips for restoring old keyboards? I have this Sharp X68000 keyboard which appears to be using ALPS switches. Some of the switches do not have the smoothest keystroke action. Hoping to restore it to better the new 😁 pic.twitter.com/fQFx9uVUrt— Macho Nacho Productions (@machonachomedia) October 11, 2023Remove the keycaps using a keycap puller or two plastic cards. Be gentle so you don’t damage the switches underneath.
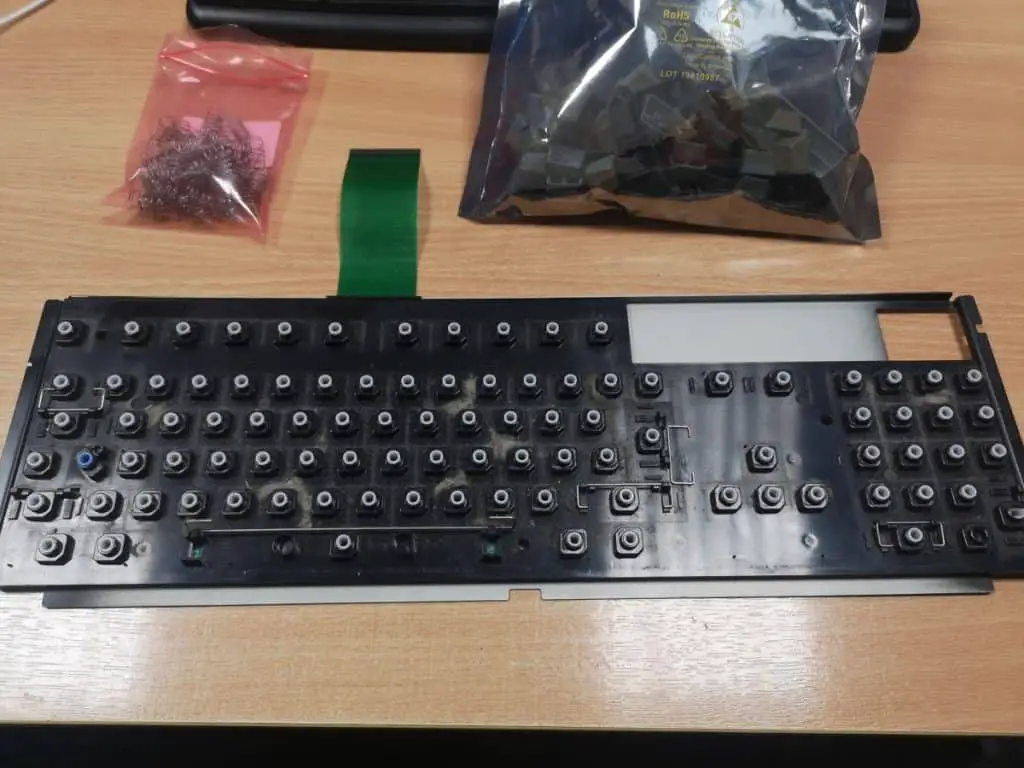
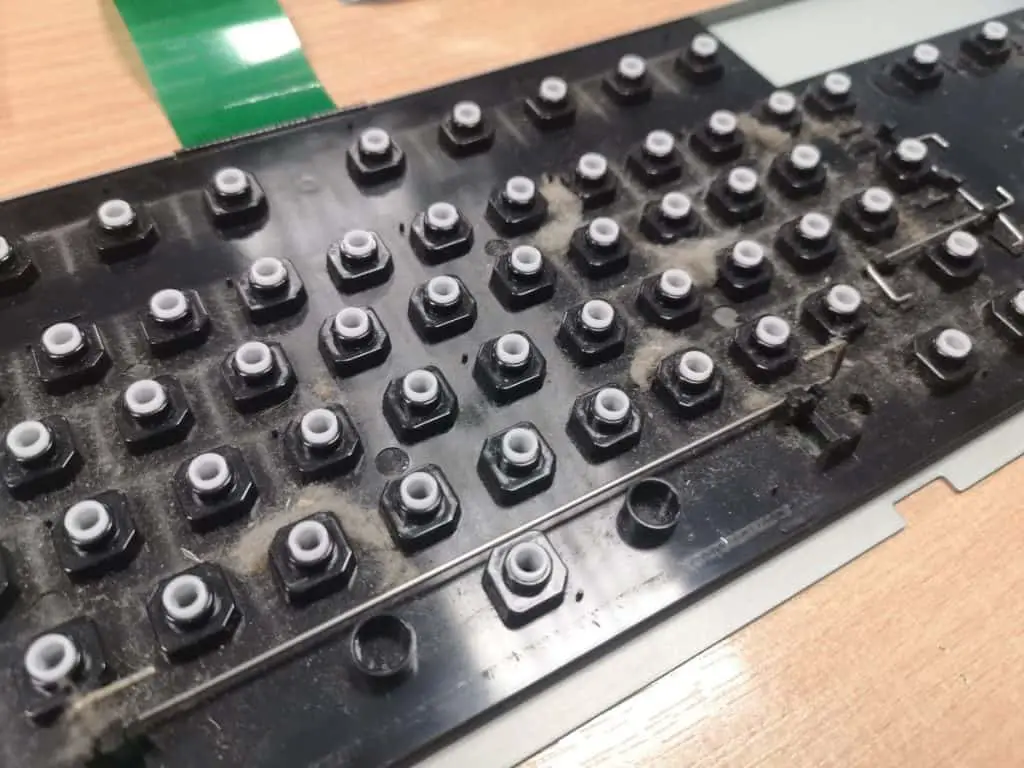
- Use your screwdriver to carefully open up the keyboard case. Keep track of all the screws and small parts!
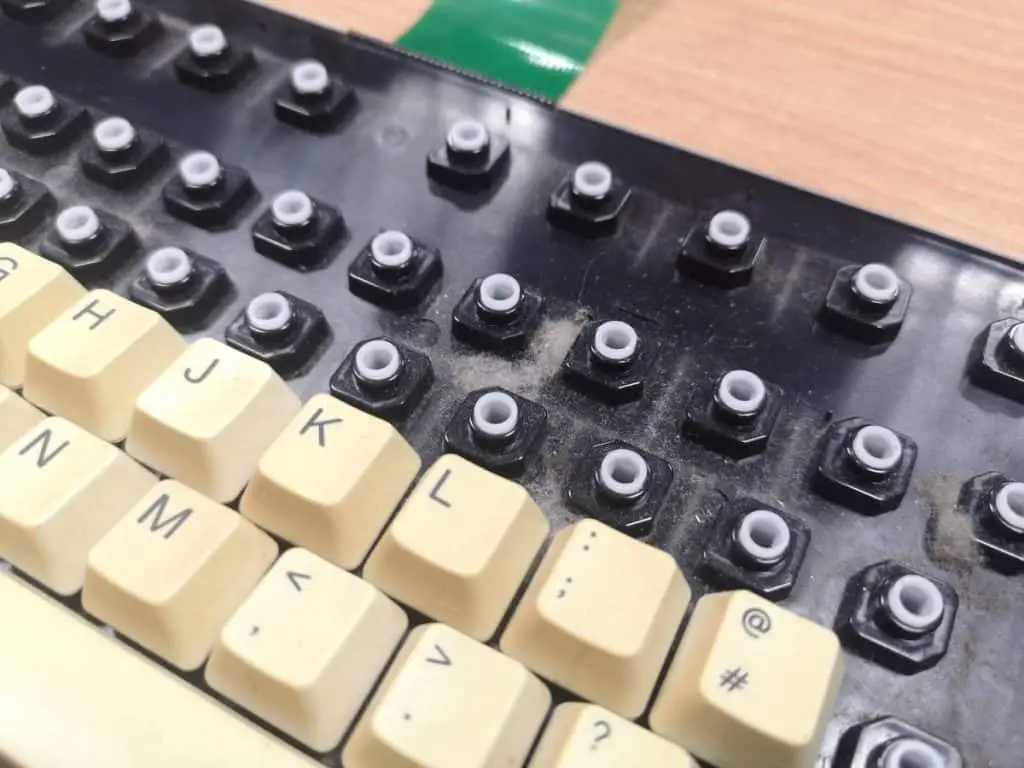
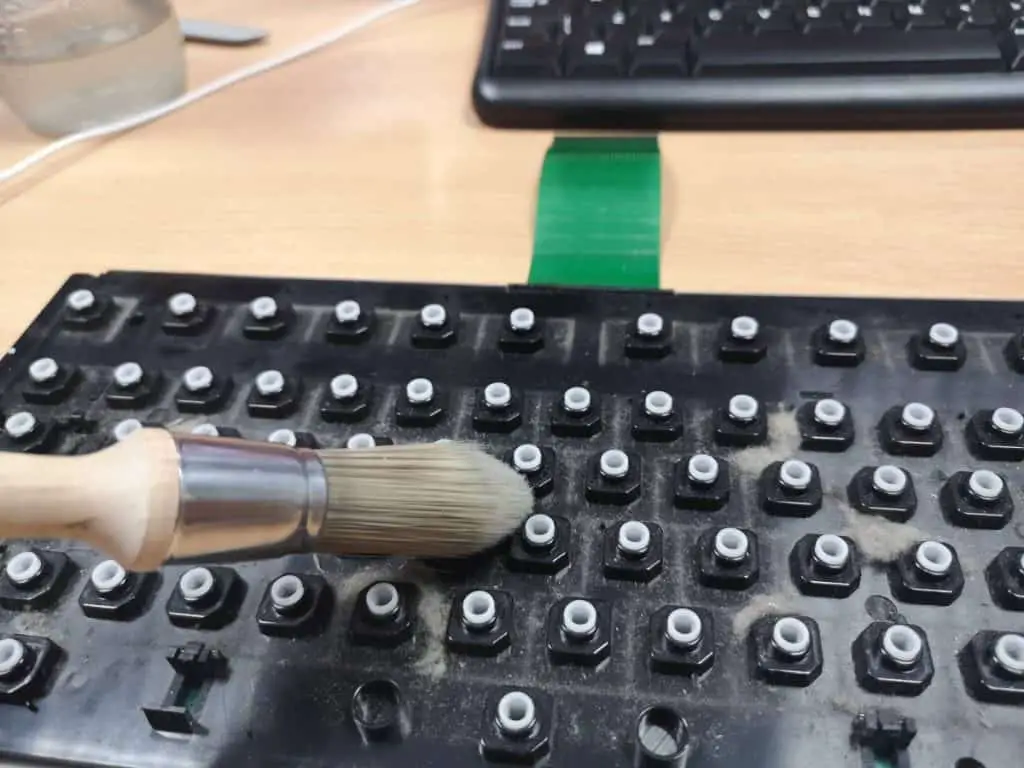
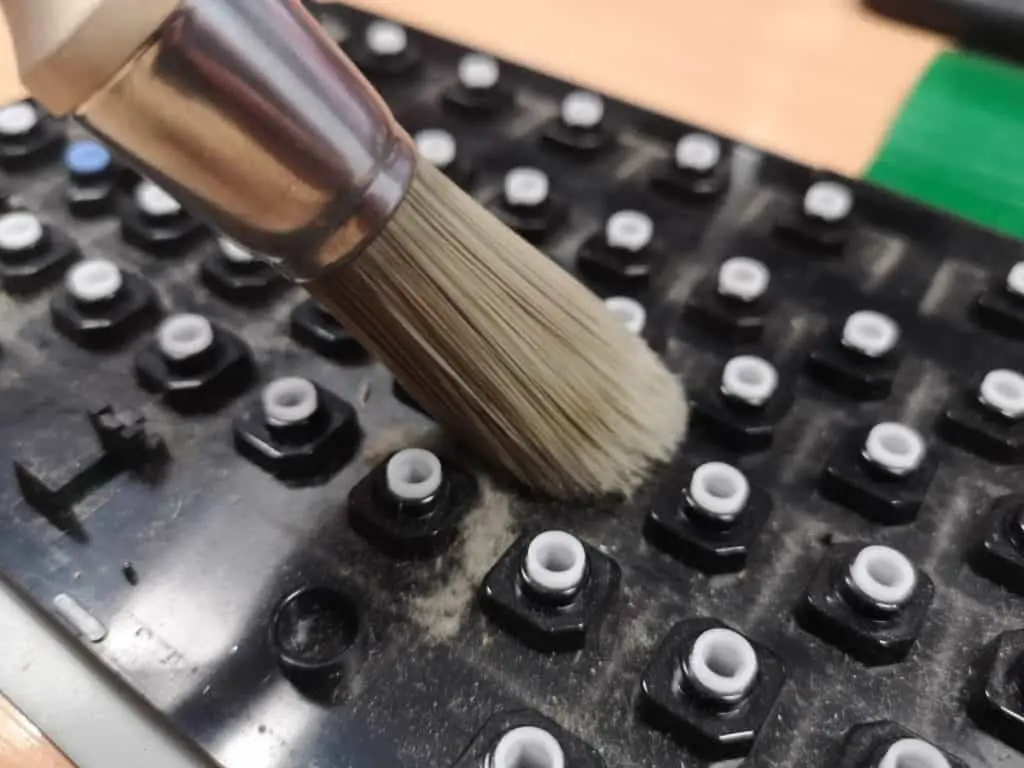
- With the keyboard fully taken apart, use isopropyl alcohol and a soft brush to clean all the parts. Pay special attention to the spaces between keys and any crevices where dirt might hide.
- For really stubborn dirt, you can use a mix of warm water and mild dish soap. Just make sure to dry everything thoroughly afterward.
- Look at each part carefully for any signs of damage or wear. This is a good time to see if anything needs to be replaced or fixed.
Step 2: Treating Yellowed Plastics
Now that our keyboard is clean, it’s time to fix that yellowing. We’ll use a method called “Retrobright,” which uses hydrogen peroxide and UV light to reverse the yellowing process. Here’s how to do it:
- Put on your gloves and safety goggles. Safety first when working with chemicals!
- In a well-ventilated area, apply a thick layer of hydrogen peroxide cream to all yellowed plastic parts. Make sure to cover everything evenly.
- Wrap the treated parts in plastic wrap to keep the cream from drying out.
- Place the wrapped parts in direct sunlight or under a UV lamp. The UV light activates the hydrogen peroxide, starting the de-yellowing process.
- Leave the parts for about 6-8 hours, checking on them every now and then. You might need to turn the parts to make sure all sides get even exposure.
- After treatment, rinse off the hydrogen peroxide thoroughly with water and dry the parts completely.
- Check the results. If some yellowing is still there, you can repeat the process, but be careful not to overdo it as too much treatment can weaken the plastic.
Remember, this process might need to be repeated for really yellowed plastics. Be patient – good results are worth the wait!
Step 3: Dealing with Sticky Keys
If your keyboard has sticky keys or a sticky rubber coating, we can fix that too. Here’s how:
- For sticky keys, use isopropyl alcohol on a cotton swab to clean around the key switch. Be careful not to let any liquid drip into the switch itself.
- If the keys are really sticky, you might need to remove the keycaps and clean the switches more thoroughly.
- For mechanical keyboards, you might want to use a special keyboard lubricant on the switch stems. This can make the keys feel better and less sticky.
- If the whole keyboard has a sticky rubber coating, you might need to remove it completely. Use a plastic scraper or your fingernail to gently peel off the coating.
- For stubborn rubber coatings, you might need to use a rubber removal solution. You can buy these, or make your own with baking soda and coconut oil.
- After removing the coating, clean the surface with isopropyl alcohol to remove any leftover residue.
- If you want, you can apply a new protective coating to the plastic. There are several options available, from clear nail polish to special plastic sealants.
Remember to be patient and careful. If you’re not sure about any step, it’s always better to ask for help or look for more information.
Step 4: Putting It Back Together and Final Touches
We’re almost done! It’s time to put our newly restored keyboard back together. This step is important to make sure your keyboard not only looks great but works perfectly. Here’s how to do it:
- Make sure all parts are completely dry before putting them back together.
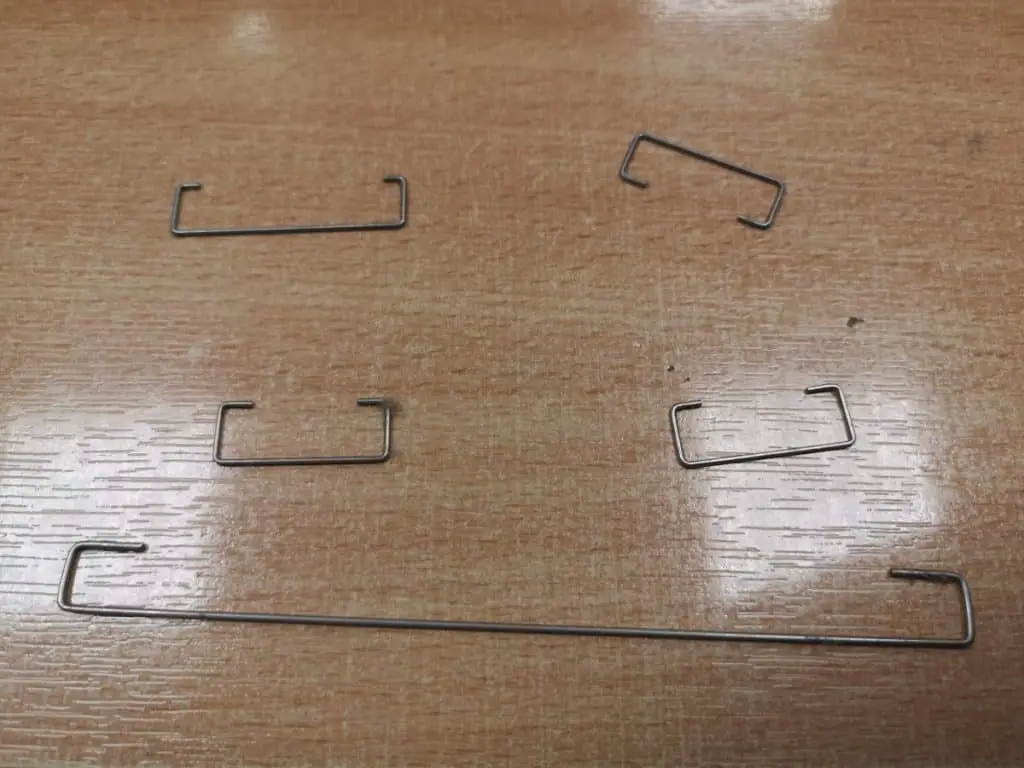
- If you replaced any parts, like switches or stabilizers, install them now. Make sure they’re seated correctly.
- Carefully put the keyboard back together, replacing all screws and components. Look at your disassembly photos if you’re not sure where something goes.
- If your keyboard has a separate controller board, reconnect it carefully, making sure all connections are secure.
- Put the keycaps back on. If you’re not sure about the layout, look at a picture you took before or look up the keyboard model online.
- Once everything is back in place, give the keyboard a final wipe-down with a soft cloth to make it shine.
- If you want, apply a thin layer of plastic polish to give your keyboard extra shine. Make sure to use a product that’s safe for your keyboard’s plastic.
- Finally, test each key to make sure it’s working correctly. This is also a good time to check for any rattling or unusual sounds that might mean something is loose.
Maintaining Your Restored Keyboard
Congratulations! Your keyboard is now restored to its former glory. To keep it looking great and working well for years to come, follow these maintenance tips:
Keyboard Maintenance Tips
- Clean regularly with a soft, damp cloth to prevent dust buildup
- Use compressed air to remove debris from between keys
- Avoid eating over your keyboard to prevent crumbs and spills
- Store in a cool, dry place away from direct sunlight to prevent future yellowing
- Use a keyboard cover when not in use to protect from dust and UV exposure
- Perform a deep clean every few months, including removing keycaps if necessary
- For mechanical keyboards, consider periodic lubrication of switches and stabilizers
- Keep liquids away from your keyboard to prevent accidental spills
- If transporting the keyboard, use a padded case to prevent damage
- Regularly check for any signs of wear or damage and address issues promptly
Conclusion: Enjoy Your Like-New Keyboard!
You’ve done it! Your once-yellowed, grimy keyboard is now clean, bright, and ready to use. You’ve not only saved a piece of tech history, but you’ve also learned some cool restoration skills. This process is about more than just making things look nice – it’s about keeping old technology working and alive.
Remember, you can use these same techniques on other yellowed plastics too, like old computer cases or game consoles. The steps of cleaning, de-yellowing, and careful reassembly work for lots of old electronics. As you get more comfortable with these techniques, you might want to try restoring other vintage tech items.
Keyboard restoration is a fun hobby that mixes cleaning, a bit of science, and a lot of patience. It’s a great way to combine technical skills with artistic touch, letting you bring new life to forgotten pieces of computing history. With these skills, you can keep your vintage tech looking fresh for years to come, making sure these pieces of history keep working and inspiring future generations.
As you type on your beautifully restored keyboard, think about the journey it’s been through. From a yellowed, sticky old thing to a shiny, working piece of tech – it shows how powerful restoration can be and how cool vintage technology still is. Happy typing on your restored keyboard, and may it work well for you for many years to come!
For more tips on restoring old tech, check out our other guides on replacing capacitors in vintage computers and restoring old computer cases. Keep that old tech working, and keep exploring the fascinating world of vintage computing restoration!