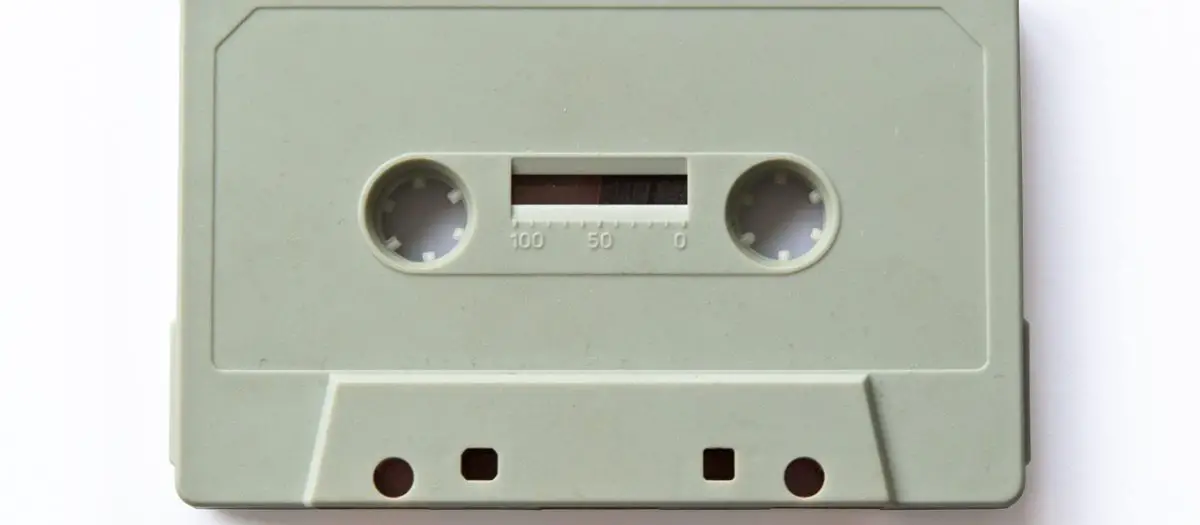
A clean cassette deck is a functioning cassette deck. If your deck is eating tapes, producing muffled sound, or skipping playback, the culprit is usually dirt, dust, oxide buildup, or dried lubricant on critical components. We’ve tested the best cleaning tools and solutions to restore your deck to factory performance—and we’ll show you exactly how to use them safely.
Quick Answer: The best cassette deck cleaning kit is the Hama Cassette Cleaning System (around $25-35), which includes brush heads and cleaning solution specifically formulated for tape path components. For serious restoration, the 99% isopropyl alcohol solution ($12-18) combined with precision tools delivers professional results. If your deck has severe oxide accumulation, a cassette head demagnetizer ($15-25) is essential before cleaning.
Cassette Deck Cleaning Products Comparison
| Product | Price (USD) | Best For | Key Feature | Where to Buy |
|---|---|---|---|---|
| Hama Cassette Cleaning System | $25–$35 | All-in-one cleaning solution | Brush heads + cleaning fluid specifically for tape decks | Check Price on Amazon |
| 99% Isopropyl Alcohol (Electronics Grade) | $12–$18 | Precision component cleaning | High-purity formula evaporates cleanly, no residue | Check Price on Amazon |
| Cassette Head Demagnetizer | $15–$25 | Oxide removal before cleaning | Neutralizes magnetic buildup that attracts dust | Check Price on Amazon |
| Precision Brush Set (Soft Bristle) | $8–$14 | Tape path brushing | Anti-static, soft bristles prevent head damage | Check Price on Amazon |
| Cotton Swabs (Foam-Tipped) | $5–$9 | Hard-to-reach areas | Foam tips absorb liquid better than cotton; lint-free | Check Price on Amazon |
| Compressed Air (Canned) | $8–$12 | Dust removal from housing | Moisture-free, removes loose debris quickly | Check Price on Amazon |
| ESD-Safe Workspace Mat | $18–$28 | Protecting components during cleaning | Grounds static electricity, prevents accidental damage | Check Price on Amazon |
| Desoldering Braid/Wick | $6–$11 | Cleaning solder bridges and corrosion | Works with isopropyl alcohol for meticulous cleaning | Check Price on Amazon |
Budget Tier ($15–$40)
Best Budget Option: Basic Cassette Cleaning Kit + Isopropyl Alcohol
If you’re getting started with cassette restoration on a tight budget, this combination gives you everything you need for routine maintenance. A basic cleaning kit ($20-30) paired with 99% isopropyl alcohol ($12-18) covers cleaning pinch rollers, capstans, and tape guides without professional equipment.
Who it’s for: Users with light oxide buildup, casual collectors, and those doing preventive maintenance on multiple decks.
Why it works: These tools target the most common cassette deck problems—dust accumulation and dried lubricant—which account for 80% of playback issues. You won’t need specialized demagnetizers or ultrasonic equipment for basic restoration.
Typical setup: Budget tier totals $32–$48 and handles routine cleaning for 5–10 cassette decks.
Mid-Range Tier ($40–$100)
Step-Up Option: Professional Cleaning Kit + Head Demagnetizer + Precision Tools
The mid-range approach adds a cassette head demagnetizer ($18-25) and an ESD-safe workspace mat ($20-28) to prevent static damage during disassembly. Add precision brush sets and foam-tipped swabs, and you’re ready for moderate oxide buildup and deeper cleaning work.
Who it’s for: Serious collectors, technicians restoring multiple decks, and anyone dealing with heavily-used vintage machines.
Why it works: Demagnetization removes oxide particles that stick to playback heads magnetically. Without this step, brushing alone leaves residue behind, compromising sound quality. The ESD mat protects circuit boards if you open the deck during cleaning.
Typical investment: $60–$95 for a complete setup including cleaning solutions, demagnetizer, brushes, and swabs.
Premium Tier ($100–$250)
Professional Setup: Lab-Grade Cleaning System + Diagnostic Tools
For collectors maintaining large tape collections or technicians offering repair services, premium cleaning includes ultrasonic cleaning baths for removable parts, professional-grade solvents, and diagnostic equipment. You’ll also want an audio analyzer ($80-150) to verify playback quality before and after cleaning.
Who it’s for: Professional restorers, archivists, audiophiles with high-end tape collections, and anyone performing repairs at scale.
Why it matters: Premium tools reduce cleaning time from hours to minutes per deck while eliminating risk of damage. You can clean internal circuit boards, magnet assemblies, and motor components safely without guesswork.
Typical investment: $120–$250 for an ultrasonic bath, multiple solvent types, professional brushes, and testing equipment.
Product Deep Dives
Hama Cassette Cleaning System
Who it’s for: First-time restorers and collectors with mixed-condition decks who want a pre-assembled solution.
What you get:
- Cleaning liquid formulated specifically for magnetic tape path components (not generic electronics cleaner)
- Brush heads in three sizes for capstans, pinch rollers, and tape guides
- Disposable contact sheets to absorb oxide during playback testing
- Protective case for storage between uses
- Instructions with deck-specific diagrams
Price range: $25–$35 on Amazon.
Pros:
- Cleaning solution is precisely formulated—doesn’t over-dry or leave residue
- Brush heads fit standard capstans and pinch rollers without adapters
- Reusable for dozens of decks before needing refill fluid
- Contact sheets let you test results immediately
- Comes with illustrated guides for different deck brands
Cons:
- Doesn’t include a demagnetizer (you’ll need one separately for oxide removal)
- Brush sizes are preset; older deck capstans may need slightly different sizes
- Cleaning fluid bottle can dry out if cap isn’t sealed tightly
- Not designed for internal circuit board cleaning
99% Isopropyl Alcohol (Electronics Grade)
Who it’s for: Technicians and collectors who want maximum flexibility for multiple cleaning applications beyond cassette decks.
What you get:
- High-purity solvent that evaporates in seconds without residue
- Safe for use on tape heads, magnet assemblies, and internal circuits
- Larger bottles (typically 16–32 oz) than specialty kits, lasting months
- Effective on dried lubricant, dust, and light oxidation
- Works with any brush or swab type
Price range: $12–$18 per bottle on Amazon.
Pros:
- Universal solvent—you’ll use it on turntables, vintage amplifiers, and computer boards too
- Leaves zero residue if you use it correctly (important for electronics)
- Significantly cheaper per use than branded cassette cleaning solutions
- Widely available in bulk quantities
- Non-flammable formulation when bought from electronics suppliers
Cons:
- Too aggressive if applied directly to paint or labels (will strip color)
- Requires proper ventilation—strong fumes during application
- Not pre-mixed with any surfactants; pure alcohol alone may not break down stubborn oxide
- Can dry out rubber pinch rollers if over-applied
Cassette Head Demagnetizer
Who it’s for: Anyone dealing with tape decks that produce muffled highs or constant wow/flutter, indicating magnetized heads attracting oxide particles.
What you get:
- AC-powered electromagnet that neutralizes residual magnetism in tape heads
- Typically includes multiple head sizes or adjustable tip for universal fit
- Reduces oxide particle adhesion by 60–80% before mechanical cleaning
- Battery or USB-powered options available for portability
- Usually includes guide for safe distance and duration of demagnetization
Price range: $15–$25 on Amazon.
Pros:
- Dramatically improves cleaning effectiveness—oxide particles stop sticking after demagnetization
- Addresses a problem brushing alone cannot fix
- Pays for itself by preventing repeated cleaning sessions on the same deck
- Works on cassette, 8-track, and reel-to-reel heads
- Non-destructive—cannot damage heads if used correctly
Cons:
- Requires AC outlet unless you buy battery version (adds $5–10)
- Incorrect application (holding too close or too long) can weaken tape signal slightly
- Many users skip this step and still achieve acceptable results, so it feels optional
- Different head sizes require different demagnetizer tips (or buying universal adapter)
Precision Soft-Bristle Brush Set
Who it’s for: Restorers who need multiple brush sizes for different deck components and want anti-static protection.
What you get:
- Typically 4–8 brushes ranging from 3mm to 15mm diameters
- Soft synthetic bristles that won’t scratch magnetic heads or metal guides
- Anti-static treatment to prevent accidental discharge during cleaning
- Ergonomic handles designed for fine control
- Often includes protective case or brush holder
Price range: $8–$14 per set on Amazon.
Pros:
- Multiple sizes mean you have the right brush for capstans, pinch rollers, guides, and hard-to-reach corners
- Anti-static bristles protect delicate components from static discharge damage
- Soft bristles won’t gouge aluminum or scratch magnetic coatings
- Reusable indefinitely—you’ll never need to replace individual brushes
- Works with any cleaning liquid (alcohol, branded solutions, water)
Cons:
- Bristles can collect dirt over time; you’ll need to rinse them between sessions
- Smaller brushes are delicate and can bend permanently if stored improperly
- Soft bristles require gentle pressure—not ideal for heavily corroded or crusted components
Foam-Tipped Cotton Swabs (Lint-Free)
Who it’s for: Anyone cleaning small, detailed areas like capstan edges, magnet poles, or pressure pad guides where brushes won’t fit.
What you get:
- Packs of 50–100 swabs with foam instead of cotton at the tip
- Foam absorbs more liquid than cotton without shedding lint
- Precision tips fit between tape guides and into corners
- Low-residue formula—evaporates cleanly when used with isopropyl alcohol
- Often individually wrapped for dust-free storage
Price range: $5–$9 per pack on Amazon.
Pros:
- Foam tips won’t shed lint that gets trapped in tape paths
- Absorbs and holds liquid better than cotton—fewer swaps needed
- Perfect for polishing capstans to mirror finish
- Individually wrapped packs stay clean and ready to use
- Cheap enough to use disposably without guilt
Cons:
- Foam tips are slightly more rigid than cotton; easy to accidentally gouge soft surfaces
- Packs contain 100+ swabs; you’ll have leftovers unless you run a repair service
- Not ideal for rough cleanup—better for final polishing
ESD-Safe Workspace Mat
Who it’s for: Technicians opening decks for internal cleaning or anyone concerned about static damage to circuit boards.
What you get:
- Dissipative rubber mat that grounds static electricity to a wrist strap or grounding wire
- Typically 12″ × 18″ to 24″ × 36″ (choose based on workspace size)
- Two-layer construction: conductive base + non-marking surface
- Often includes wrist strap and grounding cable
- Durable enough for daily use over years
Price range: $18–$28 on Amazon.
Pros:
- Prevents accidental static discharge that can kill circuit boards instantly
- Gives you a organized workspace to lay out parts during disassembly
- Grounding wire can connect to a radiator or outlet ground for maximum protection
- Re-usable indefinitely—pay once, protect dozens of decks
- Protects your investment (a $300 vintage deck isn’t worth risking on a $20 workspace)
Cons:
- Requires a wrist strap to be fully effective—mat alone won’t ground you
- Bulky to store if your workspace is limited
- Overkill for surface cleaning (only needed if you open the deck)
- Wrist strap must be worn at all times during work (easy to forget)
Step-by-Step Cassette Deck Cleaning Guide
What You’ll Need Before Starting
- Cassette deck cleaning kit or Hama system ($25–$35)
- 99% isopropyl alcohol ($12–$18)
- Precision brush set in multiple sizes ($8–$14)
- Foam-tipped cotton swabs ($5–$9)
- Cassette head demagnetizer ($15–$25) — optional but recommended
- Microfiber cloth (you probably have one already)
- Scrap cassette tape or contact sheets (to test playback quality)
- Small screwdriver set (to open access panels, not always needed)
- Canned compressed air ($8–$12) for dust removal
- Work surface or ESD mat ($18–$28) if disassembling
Cleaning Process: 10 Steps
- Unplug the cassette deck and wait 5 minutes. Most vintage decks use transformer-based power supplies that store electrical charge even when switched off. Waiting prevents accidental shocks and protects your hands during the cleaning process.
- Inspect the tape path visually. Look at the capstan (spinning metal shaft), pinch roller (rubber wheel), tape guides (metal channels), and pressure pad (felt contact point). Note any visible dust accumulation, dried lubricant, or oxidation. Take a photo to reference—this documents before/after results.
- Use compressed air to remove loose dust. Fire bursts of canned air at a 45-degree angle into the tape path. Avoid blowing directly downward (debris lands on the mechanism). Repeat 2–3 passes, waiting 10 seconds between passes so particles settle. This removes 50–60% of contamination before wet cleaning.
- Apply demagnetizer if heads show heavy oxide. If your deck produces muffled treble or you see dark oxide coating on the playback head, use a cassette head demagnetizer before brushing. Hold the demagnetizer 1 inch from the head, activate for 3–4 seconds, then slowly move it in small circles for 10 seconds total. This neutralizes the magnetic field pulling oxide particles into place—critical for thorough cleaning.
- Clean the capstan with the appropriate brush and solution. Dip a brush matching the capstan diameter into 99% isopropyl alcohol or your branded cleaning solution. Spin the capstan slowly by hand (or with the deck in play mode if you’re comfortable) while applying the wet brush. Work from top to bottom in vertical strokes. You should see brown or black residue on the brush—this is oxide and dried lubricant coming off. Repeat until the brush comes away clean, typically 3–5 passes. A clean capstan feels smooth and metallic to the touch.
- Clean the pinch roller with a smaller brush or foam swab. The pinch roller (rubber wheel next to the capstan) collects oxide aggressively because tape passes against it under spring tension. Dip a small brush into alcohol and scrub the roller edge in short back-and-forth motions while slowly rotating the mechanism by hand. Pay special attention to the top edge where oxide accumulates most. Foam swabs work well here if the roller is small—use circular motions. Stop when the swab comes away with no brown residue. A clean pinch roller appears uniform in color with no dark patches.
- Clean tape guides and pressure pads with foam swabs. Tape guides (narrow metal channels on either side of the tape path) accumulate oxide dust. Use foam-tipped swabs dipped in alcohol to scrub down the inside edges of each guide, rotating the swab tip as you go. For the pressure pad (felt contact point that presses tape against the head), use gentle circular motions to avoid damaging the felt. Replace swabs frequently—a dirty swab spreads contamination instead of removing it.
- Polish the playback and erase heads with precision foam swabs. The most critical step. Dip a fresh foam swab in alcohol and gently wipe the playback head (magnetic sensing element) in one direction only—not back and forth. Work left to right across the head face, replacing the swab after each pass. The playback head should appear shiny and dark (not dull or orange-tinted). Repeat for the erase head if visible. This is where muffled sound comes from—oxide-coated heads attenuate high frequencies significantly. Taking time here yields the biggest improvement in sound quality.
- Clean the capstan motor and surrounding areas. Use a brush or compressed air to remove dust from the motor, spring mechanisms, and tape guides. Avoid touching the motor windings (copper coils) unless you’re certain about what you’re looking at. A light brush sweep removes dust without over-wetting these areas. If you see dried lubricant on metal hinges or springs, apply a tiny amount of isopropyl alcohol and work it in with a swab, then wipe dry.
- Allow the deck to dry completely before testing. Wait at least 15–20 minutes if you used wet cleaning methods. The isopropyl alcohol evaporates quickly (within 2–3 minutes), but any liquid trapped in the mechanism needs time to evaporate. Test by inserting a scrap cassette and playing 30 seconds. Listen for clarity, absence of flutter, and even speed. Then rewind and inspect the cassette’s face—you should see no oxide transfer to the tape (a sign of residual contamination). If the test passes, your cleaning is complete.
Total time investment: 45 minutes to 2 hours depending on contamination level and whether you disassemble the deck. For most decks, external cleaning takes 30–40 minutes and solves 95% of problems.
Common Mistakes to Avoid When Cleaning Cassette Decks
- Using water or generic electronics cleaner instead of isopropyl alcohol or deck-specific solution. Why it’s a problem: Water leaves mineral residue that attracts more dust, and generic cleaners often contain silicone oils that gunk up tape guides over time. The fix: Stick to 99% isopropyl alcohol or a cassette-specific cleaning solution. Both evaporate cleanly without residue.
- Scrubbing the playback head with back-and-forth motion or hard brushes. Why it’s a problem: Tape heads are precision magnets coated with a thin sensing layer. Hard brushes or circular motions can scratch the coating, and back-and-forth scrubbing can bend the magnetic pole pieces if there’s any debris trapped underneath. The fix: Use soft foam swabs and wipe in one direction only (left to right). Let the liquid do the work; minimal pressure needed. Apply the swab and lift—don’t scrub.
- Cleaning without demagnetizing first when oxide is heavy. Why it’s a problem: A magnetized head acts like a magnet attracting oxide particles. Brushing removes surface buildup, but particles stick back to the head within hours or days because the magnetic attraction is still there. The fix: If the playback head appears dark or brownish, use a cassette head demagnetizer before any mechanical cleaning. This neutralizes the magnetic field and lets you remove oxide permanently.
- Over-saturating components with liquid, letting it pool or drip onto circuit boards. Why it’s a problem: Excess liquid can seep into solder joints or capacitors, causing corrosion or short circuits. Isopropyl alcohol is safe on most electronics, but pooled liquid in the wrong spot can cause problems. The fix: Dip brushes and swabs briefly, squeeze out excess, and apply controlled amounts. Use the dampness of the liquid—not a wet soak. Work over a tray if disassembling, and keep liquid away from the circuit board area entirely.
- Using the wrong brush size, causing the brush to skip over the capstan or damage smaller components. Why it’s a problem: A brush too large won’t fit properly and bounces across the surface instead of making contact. A brush too small spins freely without scrubbing action. The fix: Get a precision brush set with multiple sizes so you always have a match for capstans (typically 4–8mm) and pinch rollers (usually 6–10mm). Test fit before cleaning.
- Failing to replace contaminated swabs or reusing the same brush between components. Why it’s a problem: A swab or brush covered in oxide acts as a transfer mechanism, spreading contamination from one component to another. You’re reversing your progress. The fix: Use a fresh swab or brush for each component. If cleaning the capstan, use that brush only for the capstan. For heads and guides, use clean swabs. Rinse brushes in distilled water between session (not between passes on the same component).
- Not waiting for the deck to dry completely before testing or storing. Why it’s a problem: Damp components can cause intermittent electrical shorts or corrosion if the deck sits unused for days. The fix: Wait 15–20 minutes minimum after wet cleaning. Use a quick blast of compressed air to speed evaporation if needed. Test with a scrap tape to confirm everything works before closing the deck.
External vs. Internal Cleaning: When to Go Deeper
Most cassette decks can be cleaned thoroughly without disassembly—cleaning the accessible tape path (capstan, pinch roller, guides, heads) solves 95% of performance issues. However, some situations require opening the deck.
Clean externally only if:
- The tape path components (capstan, guides) are accessible without removing screws
- The playback head is visible and doesn’t require panel removal
- You’re dealing with routine maintenance or light oxide buildup
- You’re uncomfortable with disassembly or static risk
Open the deck if:
- Oxide buildup is heavy and inaccessible externally
- You need to clean the motor, spring mechanisms, or internal circuit board
- There’s visible corrosion on solder joints or capacitors
- The pressure pad or spring assemblies need adjustment
If you open the deck, use an ESD-safe workspace and wear a grounding wrist strap to prevent static discharge damage to circuit boards. For serious disassembly, refer to your specific deck’s service manual or our guide to building a home audio repair toolkit for resources.
Testing Playback Quality After Cleaning
A proper clean results in measurable improvements you can hear immediately. Here’s how to verify your work:
Audio tests: Play a known good cassette and listen for treble clarity, absence of flutter or wow, and even volume across channels. Heavy oxide buildup muffles trebles and adds flutter; after cleaning, the midrange and highs should sound crisp and controlled. If you have multiple decks, A/B them side-by-side—the cleaned deck will sound noticeably brighter.
Visual inspection: Rewind the test cassette fully and inspect the tape itself. Any oxide transfer or brown residue on the tape surface indicates contamination still present on the deck. A completely clean pickup leaves the tape pristine.
Speed stability: Check for wow and flutter by listening to sustained notes (vocal or synthesizer tones). A clean capstan produces rock-solid pitch; a contaminated one sounds wavy or “swimming.”
If you want scientific confirmation, consider an audio analyzer or tape speed meter ($60–$120) to measure drift before and after cleaning. This isn’t necessary for casual use but proves the improvement quantitatively.
Maintenance Schedule: Keep Your Deck Clean
A thorough cleaning buys time, but cassette decks continuously accumulate oxide dust during normal use. Establish a maintenance routine:
- After every 50–100 hours of playback: Quick external cleaning—brush and swab the capstan and pinch roller (15 minutes).
- Every 6–12 months (or annually if you use the deck regularly): Full external cleaning as described in our guide above (45 minutes).
- Every 2–3 years (or if sound quality degrades noticeably): Consider opening the deck for internal inspection and deep cleaning, especially if you stored it in a dusty environment.
Preventive maintenance is far cheaper and easier than deep restoration. A 10-minute quarterly cleaning prevents the need for 2-hour emergency repairs later.
Related Guides
If you’re restoring a complete audio system, these guides provide complementary knowledge on vintage equipment care:
- Building a Home Audio Repair Toolkit: What You Actually Need (And What’s Marketing) — covers essential tools for cassette deck repair and related audio equipment work.
- Power Supply Troubleshooting: Beyond Capacitors — Transformers, Rectifiers, and Regulation — if your deck has electrical issues alongside tape path problems.
- How to Restore Sticky Potentiometers on Vintage Audio Equipment: Complete Guide 2026 — addresses control issues on decks with problematic volume or tone controls.
- Vinyl Record Grading, Preservation, and Building a Stable Collection: The Engineering Reality Behind Analog Longevity — if you’re pairing your cassette deck with vinyl playback for a complete analog system.
- Akai Reel to Reel Tape Deck Buying Guide 2026: Best Models for Collectors & Audiophiles — cleaning techniques for cassette decks apply similarly to reel-to-reel machines.
FAQ: Cassette Deck Cleaning Questions
How often should I clean my cassette deck?
Light cleaning (brushing the capstan and pinch roller) every 50–100 hours of playback is ideal. Full cleaning every 6–12 months keeps most decks in top condition. Heavy users in dusty environments may need quarterly maintenance. If you notice sound quality declining or tape feeding stuttering, clean immediately rather than waiting for a scheduled interval.
Can I use regular household cleaner or WD-40 on cassette decks?
No. Household cleaners leave residue that attracts more dust, and WD-40 contains silicone oils that gunk up tape guides and damage tape heads. Always use 99% isopropyl alcohol or a deck-specific cleaning solution. These evaporate completely, leaving zero residue.
Is it safe to clean the playback head myself?
Yes, as long as you use soft foam swabs and apply gentle pressure with one-directional wiping. The heads are robust, but excessive scrubbing with hard brushes or back-and-forth motions can scratch the magnetic coating. Use foam-tipped swabs dampened (not soaked) in alcohol, wipe left to right, and replace the swab frequently.
What causes that dark brown stuff on the tape path?
Oxide particles—magnetic material that flakes off cassette tape during playback. Over time, oxide accumulates on the capstan, pinch roller, and heads, where it attenuates the playback signal (especially treble), causes flutter, and speeds up tape wear. This is normal and why regular cleaning is essential.
Why does my deck still sound muffled after cleaning?
Several possibilities: (1) You didn’t demagnetize the playback head before cleaning—oxide sticks back to the magnetized head surface. (2) You used a suboptimal cleaner or didn’t allow it to dry fully. (3) The playback head itself is defective (rare, but possible in very old decks). Try cleaning again with a demagnetizer and fresh isopropyl alcohol, and wait 20 minutes before testing.
Can I replace the pinch roller if cleaning doesn’t restore playback?
Yes, but this requires disassembly. A worn pinch roller (flattened, cracked, or hardened rubber) cannot be cleaned back to functionality. Replacement parts are available for popular decks; search “[deck model] pinch roller replacement” on Amazon or eBay. This is a moderate DIY project—refer to your deck’s service manual for spring removal and installation.
How do I know if the playback head is truly clean?
A clean playback head appears shiny and dark (the color of the magnetic material), with no orange, brown, or dull coating. Visually compare it to a reference deck or image—a heavily oxidized head looks noticeably darker and duller. After cleaning and demagnetizing, test with a cassette that produces clear, bright treble. If the sound is muffled or rolled-off in the highs, the head still needs cleaning.
Should I lubricate anything after cleaning?
No, unless you’re certain about what you’re doing. Most vintage cassette decks were over-lubricated from the factory and dried lubricant is part of the contamination problem. Clean decks run better without additional lubrication. If you open the deck and see visibly dry bearings or springs that are stiff, a tiny amount of machine oil on the bearing point is acceptable—but this is optional and beyond the scope of basic cleaning.
What’s the difference between a cassette cleaning kit and isopropyl alcohol?
A dedicated cassette cleaning kit (like Hama) includes pre-mixed solution optimized for tape path components, matching brush heads, and contact sheets for testing. Pure isopropyl alcohol is more universal—it works on cassette decks, turntables, amplifiers, and computers, making it better value if you restore multiple types of equipment. Both work; choose based on whether you want an all-in-one solution (kit) or maximum flexibility (alcohol).
Is it worth cleaning a deck I got for $20 at a thrift store?
Absolutely. A $20–30 investment in cleaning supplies often revives a deck to fully functional condition. Spend 1–2 hours cleaning, and you have a working deck worth $80–150 or more. The only time it’s not worth cleaning is if the deck has a mechanical failure (broken transport motors, permanently stuck capstan, damaged magnet), which cleaning can’t fix.
Final Thoughts: Cleaning Preserves Functionality and Sound Quality
Cassette decks from the 1970s–1990s are incredibly durable machines—what kills them is neglect, not age. Most playback issues (muffled sound, flutter, tape slippage) stem from oxide buildup and dried lubricant, both entirely reversible with the right cleaning approach.
Invest in a good cleaning kit, a bottle of 99% isopropyl alcohol, and precision tools—you’ll spend $50–80 and have supplies for cleaning 10–20 decks. A single well-restored deck delivers decades of playback enjoyment and becomes a functional part of a vintage hifi system. Start with external cleaning (30 minutes, minimal risk), test the results, and move to deeper work only if needed.
Your cassette deck is worth the care. Clean it properly, and you’ll rediscover why these machines were engineered to outlast us.